This chapter describes the main elements of the user interface:
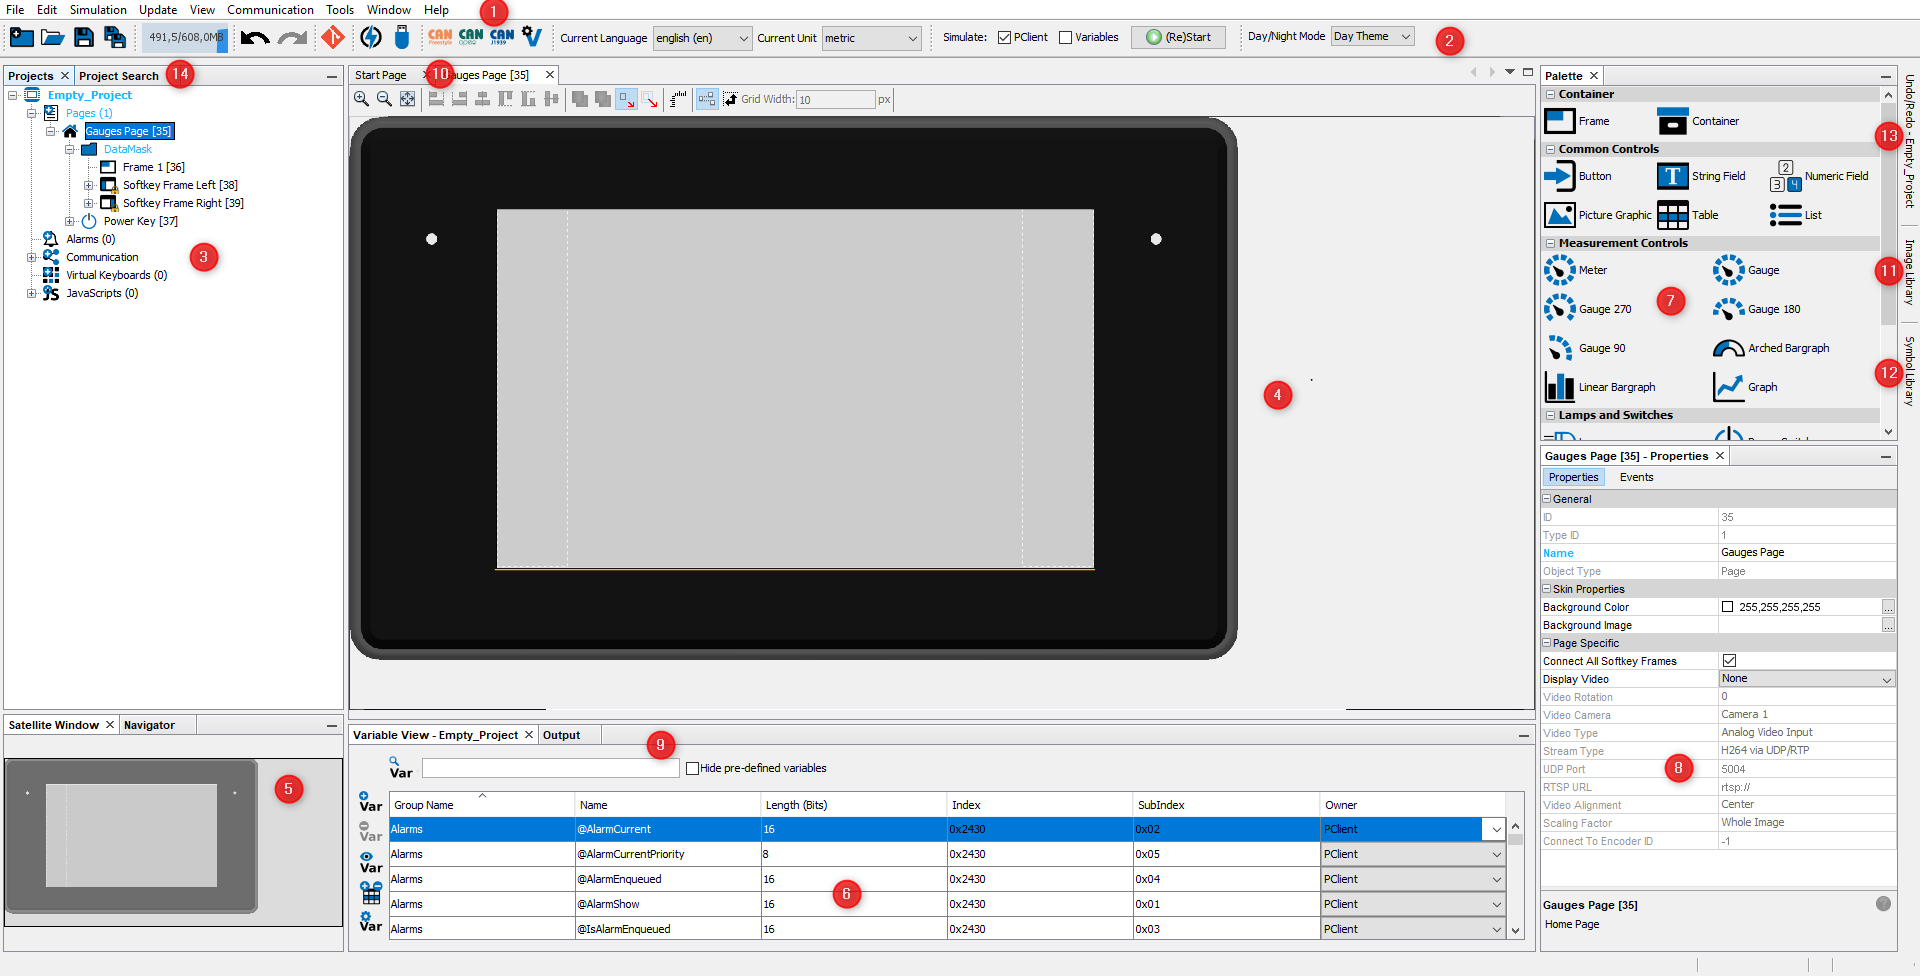
Menu Bar (1)
Menu |
Description |
|---|---|
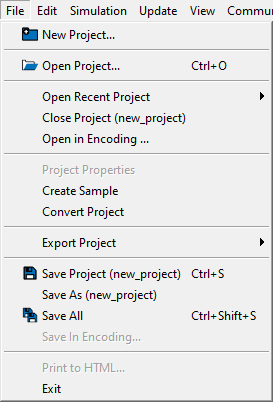
File |
New Project...: Create a new project. See Quick Start Tutorial to see how to create a new project Open Project...: Open an existing project. Open Recent Project: Open one of the last opened projects. Close Project (project name): Close the currently selected project. Open in Encoding...: Opens a file in the JavaScript editor with the chosen encoding Project Properties (project name): Edit the project properties of the currently selected project Create Sample: Create a new sample project. Read more. Convert Project: Convert the current project to other display types. Read more. Export Project: Export the project to a ZIP file to send it to someone. Save Project (project name): Save the current project. Note that the entry is disabled if no changes were made to the project. Save As (project name): Save the current project under a different name. Save All: Save all currently open projects. Save in Encoding...: Saves the file in the JavaScript editor with the chosen encoding Print to HTML: Only for the JavaScript Editor. Prints the currently opened JavaScript file into an HTML file. Exit: Close the program. |
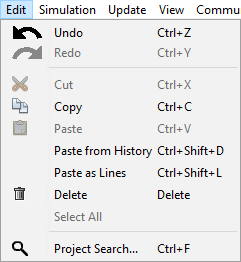
Edit
|
Undo: Reverts the last modification in the project. For a complete list of Undo/Redo steps check the Undo/Redo tab. Redo: Re-does the last reverted modification in the project. For a complete list of Undo/Redo steps check the Undo/Redo tab. Cut: Cut the currently selected object(s). Note that paste after cutting only works if the parent of the cut object changes. Copy: Copy the currently selected object(s). Paste -> Paste: Paste the currently selected object(s). The parent object of the source object has to be selected. Read more. Paste -> Paste as Reference: Paste the currently selected object(s) as references. All properties are identical. The parent object of the source object has to be selected. Read more. Paste -> Shallow Paste: Paste the currently selected object(s). Children objects will be reference copies. The parent object of the source object has to be selected. Read more. Paste from History: Only for the JavaScript Editor. Opens a popup with the last copied texts for pasting. Paste as Lines: Only for the JavaScript Editor. Pastes multi-line copied text to one line per multi-cursor. Delete: Delete the currently selected object(s). There will be a confirmation dialog. Select All: Only for the JavaScript Editor. Marks all text in the currently opened JavaScript file. Project Search...: Opens the project search. |
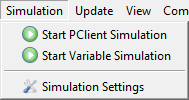
Simulation
|
Start PClient Simulation: Starts the PClient Simulation. Start Variable Simulation: Starts the Variable Simulation. Simulation Settings: Settings for the Simulation. |
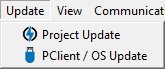
Update
|
Project Update: Opens the Project Updater Dialog. PClient / OS Update: Opens the PClient / OS Update Dialog |
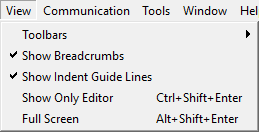
View
|
Toolbars: Provides customization options for the toolbar. Show Breadcrumbs: Only for the JavaScript Editor. Enables or disables the breadcrumbs bar in the JavaScript editor (only useful if classes and functions are used). Show Indent Guide Lines: Only for the JavaScript Editor. Enables or disables vertical indent lines in the code view. Show Only Editor: Maximizes the currently selected editor window. Full Screen: Switches to Full Screen view. |
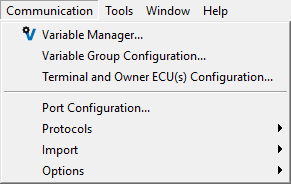
Communication
|
Variable Manager...: Opens the Variable Manager. Variable Group Configuration...: Opens the dialog to manage and add variable groups. Terminal and Owner ECU(s) Configuration...: Opens the dialog to add / remove and configure CAN protocols for the project. Port Configuration...: Opens the dialog to configure the bus speeds of the CAN ports for the project. Protocols -> -CANFreestyle-> --Configure Mappings: Opens the Mapping Configuration dialog for CANFreestyle. Read more. --Transmit Sequences...: Opens the dialog to configure Transmit Sequences. Read more. --CAN ID Masks...: Opens the dialog to add / remove and configure CAN ID masks. Read more. -CANopen -> --Configure Mappings: Opens the Mapping Configuration dialog for CANopen. Read more. --Generate EDS File: Creates an EDS file. Read more. -J1939 -> --Configure Mappings: Opens the Mapping Configuration dialog for J1939. Read more. --DM1/DM2 Settings...: Opens the dialog to configure DM1 / DM2 support. Read more. Import-Export-> -Import Variables: Opens the dialog to import variables from another project or from a .CSV file. Read more. -Import DBC File: Opens the dialog to import a DBC file. Read more. -Export DBC File: Opens the dialog to export a DBC file. Read more. Options -> -Data type definitions...: Create and manage variable data types. -Process Configuration...: Create and manage processes as variable owners (only for additional C/C++ applications). |
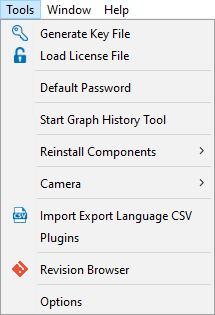
Tools
|
Generate Key File: Generate a key file to obtain a license file. Load License File: Load a license file to unlock the full version. Default Password: Opens the dialog to set a default password that will be used to unlock projects with a password. Start Graph History Tool: Starts the Graph History Tool. Reinstall Components: Opens the dialog to reinstall different external components of the program. Only needed if one of the elements listed is missing files. -Camera -> -- ISO 17215 Camera Configuration: Opens the Ethernet Camera configuration tool. Import Export Language CSV: Opens the dialog to export / import a language CSV file. Read more. Plugins: Opens the plugins management dialog. Read more. Revision Browser: Opens the project versioning revision browser. Options: Opens the options dialog. Read more. |
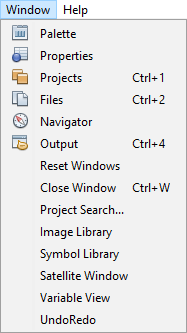
Window
|
Palette: Opens the object palette window. Properties: Opens the object properties / events window. Projects: Opens the Projects Tree window. Files: Opens the project file view window. Navigator: Opens the JavaScript code structure window. Output: Opens the output information window. Reset Windows: Resets all windows of the program to the default sizes and positions. Close Window: Closes the currently selected window. Find Usages: Opens the Find Usages window. Image Library: Opens the Image Library tab. Symbol Library: Opens the Symbol Library tab. Satellite Window: Opens the Satellite window. Variable View: Opens the Variable View window. UndoRedo: Opens the Undo/Redo window.
Note that if the respective window is already open, the according menu entry doesn't do anything. |
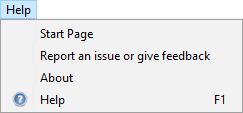
Help
|
Start Page: Opens the start page with Welcome text, release notes, RSS news and recent projects. Report an issue or give feedback: Opens the reporting dialog. About: Opens the version info dialog. Here you can see all software versions, get detailed information and read the list of open source licenses. Help: Opens this HTML help. By default, the online version of this help is loaded. If no internet connection is available, a local version of the help is loaded. Please note that the offline version is not refreshed as often as the online version. |
Toolbar (2)
Icon |
Description |
|---|---|
|
Create a new project. |
|
Open a project. |
|
Save selected project. Only active if changes have been made to the project.* |
|
Save all open projects. |
|
|
|
Opens the revision browser. |
|
Saves the project and opens the Project Updater Dialog. Read more. |
|
Opens the PClient / OS Update Dialog. Read more. |
|
Shortcuts to mapping dialogs for CANFreestyle, CANopen & J1939. |
|
Opens the variable manager. |
|
Change the language shown in the page editor. |
|
Change the unit shown in the page editor. |
|
Select and start PClient and/or variable simulation. The project will be saved before the simulation starts. |
|
Switch between Day or Night mode view in the page editor. |
*We are trying to be perfect, but it might be that some actions are not tracked and the save button stays disabled even though you changed something. In that case please
- contact us! Let us know what you did that wasn't tracked.
- Use the Save all button which will never be disabled.
Projects Tree (3)
The project tree shows the logical structure of the project.
Here is what you can read from the following tree:

•The project name is MyFirstProject
•The project contains the categories Pages, Alarms, Communication, Virtual Keyboards, JavaScripts
•The project has two pages: Gauges Page and Configuration Page.
•The Gauges Page is the home page of the project (home icon).
•The Gauges Page has a DataMask (i.e. an empty drawing area), an Escape Key, a Home Key, a Function Key and an Encoder.
•In the DataMask (i.e. drawing area) there is a Frame 1 and a Left and Right Softkey Frame.
•A Meter 1 and two Button 1 objects are located in the Frame 1.
•The second button object (ID 55) has been locked in position and size.
The tree shows a parent-child relationship. Example:
•The Meter 1 is a child of the Frame 1.
•The Frame 1 is the parent of the Meter 1.
The parent-child relationship defines how objects that are visible on screen are drawn. On the one hand, a child can never be drawn outside of its parent. I.e. the child is clipped at the parent borders. On the other hand, the order of children defines which object is in front of another object (this is called Z-order). For example:
•Softkey Frame Right is drawn in front of Softkey Frame Left.
•Softkey Frame Left is drawn in front of Frame 1.
We also provide additional information through colors and icons:
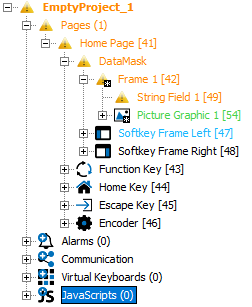
Green - This object has been created since the last save
Blue - This object has been modified since the last save (or a child object has been added). Also indicated with the black asterix next to the object icon.
Orange - There is a problem with the properties for object. Select the object and then the colored property or event to see a description of the problem. Also indicated with the yellow warning icon.
The colors will be passed to the parent objects up to the project name. Note that with a new object, only the object itself will be marked green. All parents will be marked blue, since for the parents the new object is a change, but they themselves are not new.
In case there is both a problem and an object modification, the problem will be shown in the project tree with higher priority.
When a project is loaded,
Objects can be renamed in the project tree by selecting them and pressing F2, or clicking on them again after selecting them.
Pages can be moved in the project tree to change their order for a better project overview.
With <Alt> + <PgUp> / <Alt> + <PgDn> pages can be moved one step higher / lower.
With <Alt> + <Pos1> / <Alt> + <End> pages can be moved to the top / bottom.
Page Editor (4)
The Page Editor allows designing the graphical user interface.
Satellite Window (5)
The satellite window shows the whole display device and the viewing part visible in the editor. It is useful for a fast navigation when the page editor is zoomed in and only shows a small piece of the whole display.
Variable View (6)
The Variable View allows viewing, creation and editing of variables. Furthermore it can be used to easily link a variable with an object in the editor by dragging & dropping the variable to the object.
Palette (7)
The palette contains all the graphical objects that can be dragged & dropped into the editor.
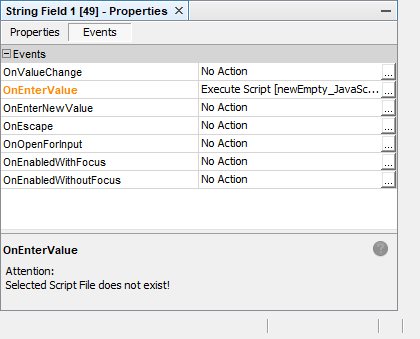
Properties Window (8)
The property window shows all the properties available for the currently selected object.
The output window provides information, warnings and errors that occur while using the program. They might help finding the root cause if you run into trouble.
Also, system console outputs from the PClient simulation will be printed here.
Start Page (10)
The new Start Page shows the recently opened projects, information about the current version and an RSS feed with news and update information.
Symbol Library (11)
This button opens the symbol library tab.
Image Library (12)
This button opens the image library tab.
Undo/Redo (13)
This button opens the Undo/Redo tab.
Project Search (14)
This button opens the Project Search tab.