Sometimes users would like to have an old state from some months ago of the project to do some edits for a special customer who shouldn't get the latest changes.
Sometimes it happened that a project had an error and could not be opened anymore in the OPUS Projektor.
For these use cases and others we are introducing a simple, yet powerful project versioning system.
We used JGit, a Java library implementing the widely known Git version control system.
Please note that we did NOT implement branches or merging of different project revisions.
How can I start using this feature?
New projects
In the new project dialog, an option appears in the second screen.

If this check box is checked (default setting), project versioning is enabled for this project.
Existing projects
For existing projects, the versioning will not appear upon project opening.
When you save the project for the first time, this dialog will appear.
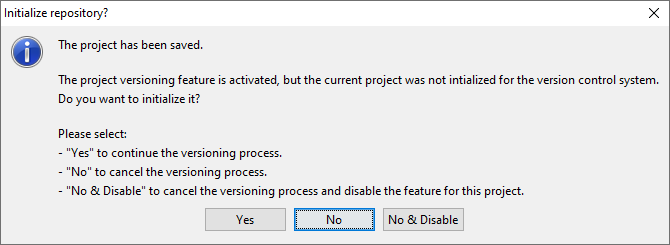
Choose yes to start using the versioning system for the project.
Choose No to not start using the versioning system for the project at the moment, i.e. you will be asked the same question at the next save.
Choose Cancel not start using the versioning system for the project and disable versioning for this project, i.e. you will not be asked this question again (but you can enable the versioning again in the project properties).
How can I turn versioning on / off later on?
Versioning can be turned on / off in the project properties of each project.
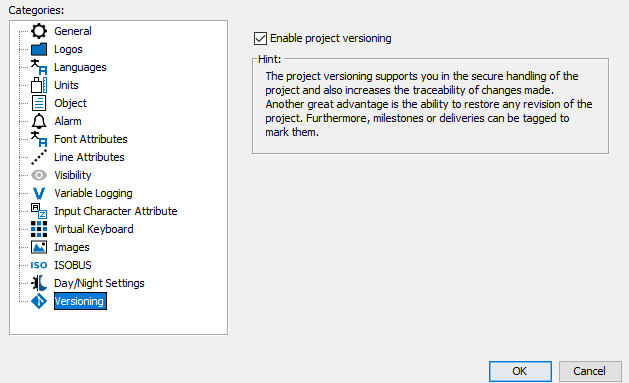
If versioning is turned off, the existing revision data is kept, so if versioning is enabled again, all existing revisions are still available.
It is also possible to still open the revision browser to see all existing revisions. Tags can also still be managed.
What happens in my project folder?
If you enabled versioning for a new or existing project, a folder and a file will be added to the project folder.
![]()
![]()
In the .git folder all necessary information and data for the project versioning is located. Please don't edit this folder or anything of its content in any way and don't delete it.
The file .gitignore states some files that are excluded from the versioning. These are files that are not necessary for project loading.
At the moment, these files are listed in there.
•/terminal_files.zip
•/imported_fonts.zip
•/log.0
•/log.1
•/log.2
As with the .git folder, please don't edit or remove this file.
How can I access the different stages of my project?
When opening a versioned project, you will see a dialog like this:
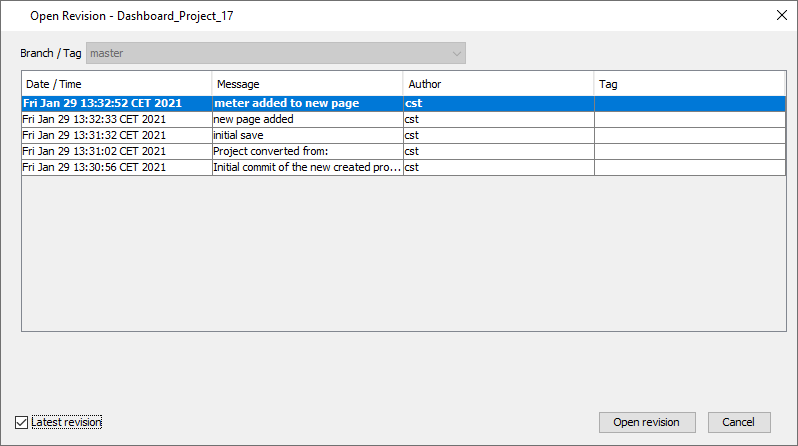
The dialog shows the different revisions of this project. A revision is a certain state of the project, defined usually by a project save or a conversion.
If you just click "Open revision", it will open the latest revision of the project (probably the most important use case).
If you want to access one of the older revisions, you need to uncheck the "Latest revision" check box. Then you can select any of the revisions and load these by clicking "Open revision".
Cancel stops opening the project.
Will I lose newer stages of my project if I open an old revision?
If you open an older revision and then try to save the project, this dialog will appear:
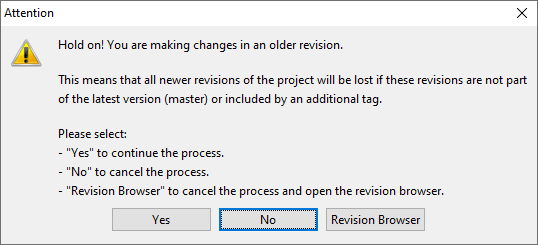
So yes, if you click yes now, all newer revisions of the project will be deleted (unless they have been tagged).
If you click No, nothing happens. If you click Revision Browser, the revision browser will be opened and you can manage your revisions.
How do I use the revision browser?
You can access the revision browser by clicking on the toolbar item ![]() or through the menu item Tools -> Revision Browser
or through the menu item Tools -> Revision Browser
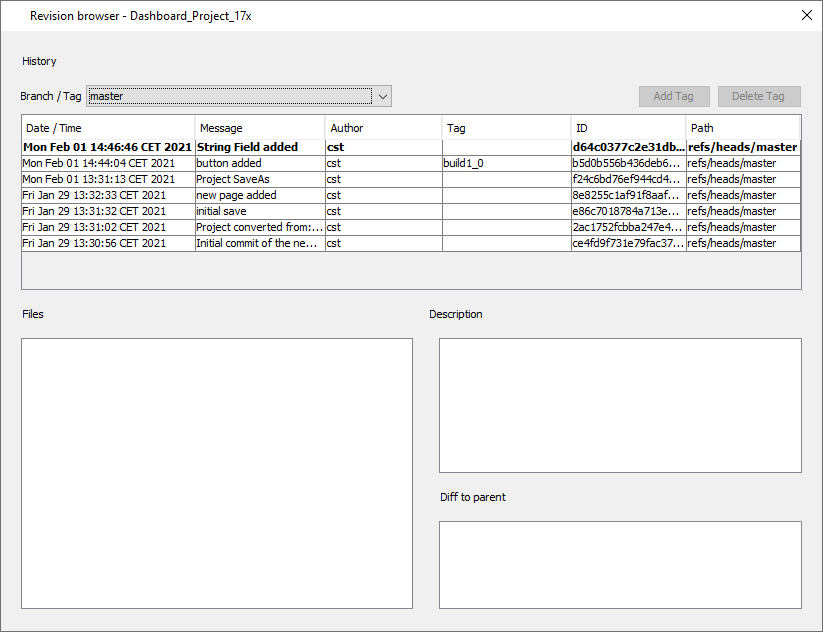
In the revision browser the different revisions of the currently selected project can be viewed. Additionally, tags can be created, moved and deleted.
What are tags?
If you open an older revision of a project, make changes to it and try to save it, you will be warned that all newer revisions will be lost if the save is completed.
However, it might be interesting to conserve certain project states, e.g. as delivery states as they went to the customers.
For this purpose tags can be used.
Tags can be added to any project revision in the revision browser.
Additionally, a tag can be set in the commit dialog that appears during a project save.
Note: If you move a tag, it is possible that revisions are deleted, if they are not part of that tag, another tag or the latest version ("master").
What is this dialog that appears upon saving the project?
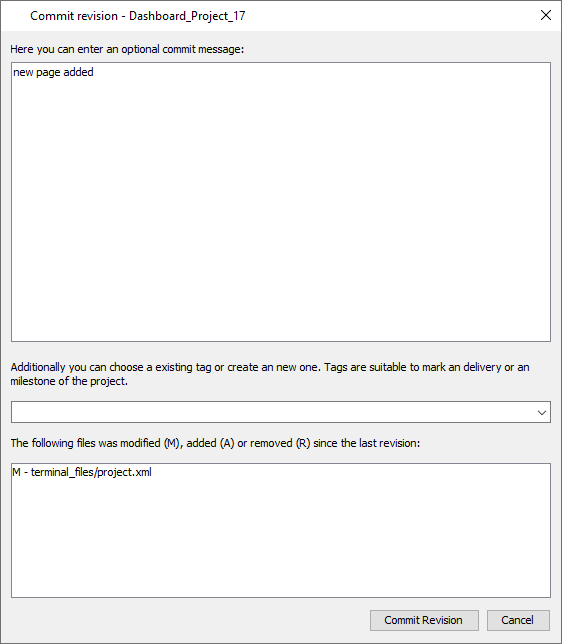
When a versioned project is saved, a revision commit dialog appears. Here the user can add a comment to a commit and choose or create a new tag.
A click on Commit Revision commits the currently saved revision to the versioning system.
Cancel cancels the commit process.
Note: The project has already been saved at that point. The save process is not canceled by clicking Cancel here.
Can I use versioning but not have this pesky dialog at each save?
It is possible to enable auto-commit in the options.
Note that enabling this means that no commit messages can be added to project revisions which can reduce clarity.
It is still possible to add tags to project revisions in the revision browser.
When do I risk losing a revision?
The versioning system only deletes revision that do not have a reference to the "master" (i.e. the latest state of a project) or to a tag.
Let's look at an example:
A first save of a project
|
|
|
|
|
|
|
|
|
Revison 1 (Master) |
|
|
|
|
|
|
|
|
Some edits to the project, delivery to a customer
|
|
|
|
|
|
|
||
Revison 1 |
Revison 2 (Master) Tag Delivery_2021_02_03 |
|
|
|
|
|
|
|
More edits to the project
|
|
|
|
|
|
|||
Revison 1 |
Revison 2 Tag Delivery_2021_02_03 |
Revison 3 (Master) |
|
|
|
|
|
|
At this stage, revision 1 and 2 are referenced by the tag "Delivery_2021_02_03".
Revisions 1, 2 and 3 are referenced by the latest revision ("master").
Now we load Revision 1 of the project, make changes to it and save the project (agreeing to the warning that is shown when committing the save).
What happens?
Tag "Delivery_2021_02_03"
|
|
|
|
|
|
|
||
Revison 1 |
Revison 2 Tag Delivery_2021_02_03 |
|
|
|
|
|
|
|
"Master" branch
|
|
|
|
|
|
|
||
Revison 1 |
Revison 4 (Master) |
|
|
|
|
|
|
|
Note that by doing the above work flow, revision 3 was deleted, because it did not have any reference, not by the tag "Delivery_2021_02_03" nor by the "master".
My save process was interrupted, my computer crashed or something, my project is broken, what do I do now?
When opening the project, uncheck the "Latest revision" check box and load the second revision from the list (assuming that the first one is the one that is broken).
What if I don't want to commit with every save?
There are options in the Versioning tab of the Options menu.
It is possible to enable or disable automatically committing on
•saving the project
•downloading the project
•starting the PClient simulation
If you disable all three options, committing has to be done manually in the tool bar.