![]() Tutorial video about the Updater
Tutorial video about the Updater
The Updater is a small GUI application which allows the user to transfer a project to the device via CAN bus or to a USB drive.
The Updater has two parts.
One part is just called Updater or HostUpdater. This is the GUI application which runs on the PC and is described here.
The second part is running on the device and is called ClientUpdater.
The Updater can only be started if a project is selected in the project tree. If the condition is achieved, the tool bar icon is enabled. The tool bar icon can be found here:
|
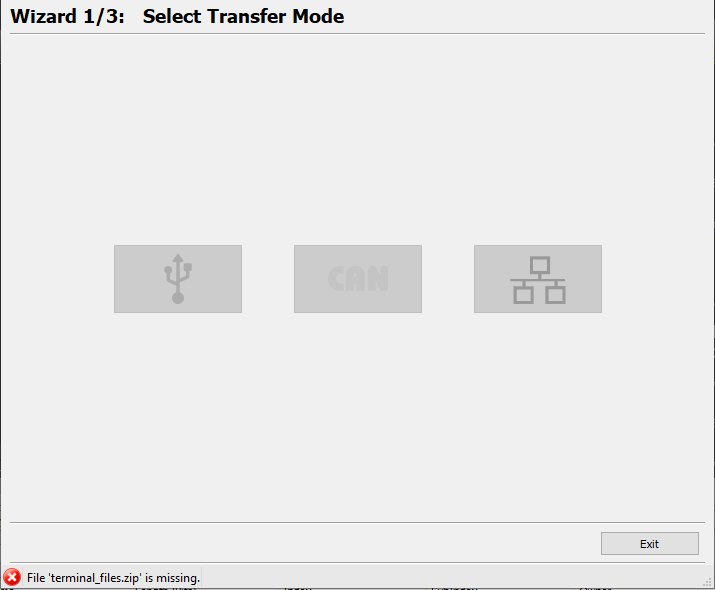
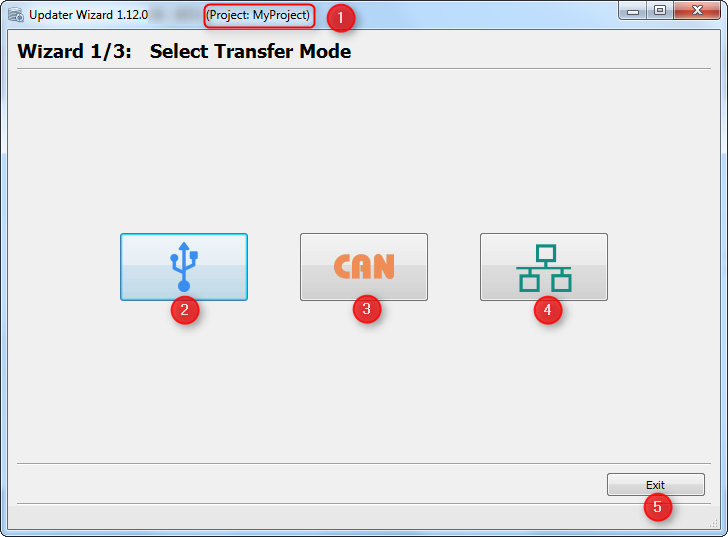
When the Updater icon in the toolbar is pressed, first the project will be saved, then the Updater will be opened, which helps you to transfer the project. It guides you step by step. First the Start Page (Wizard 1/3) is shown, where you can choose the transfer mode.
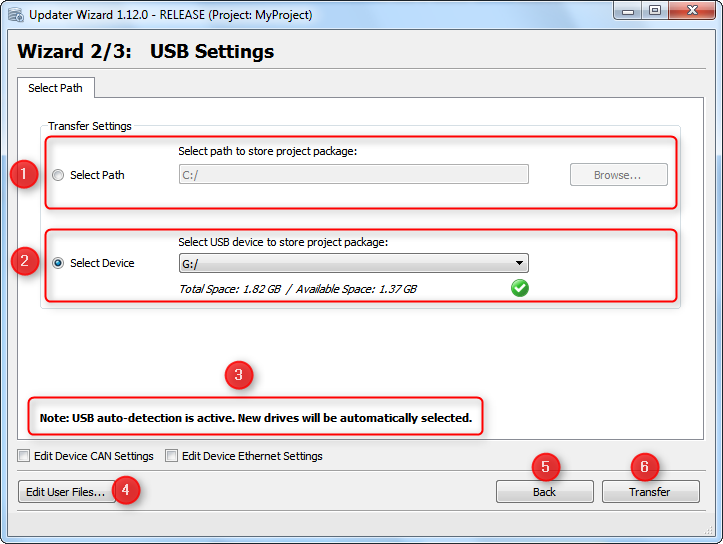
Currently you can choose between 3 update modes: •USB update and
|
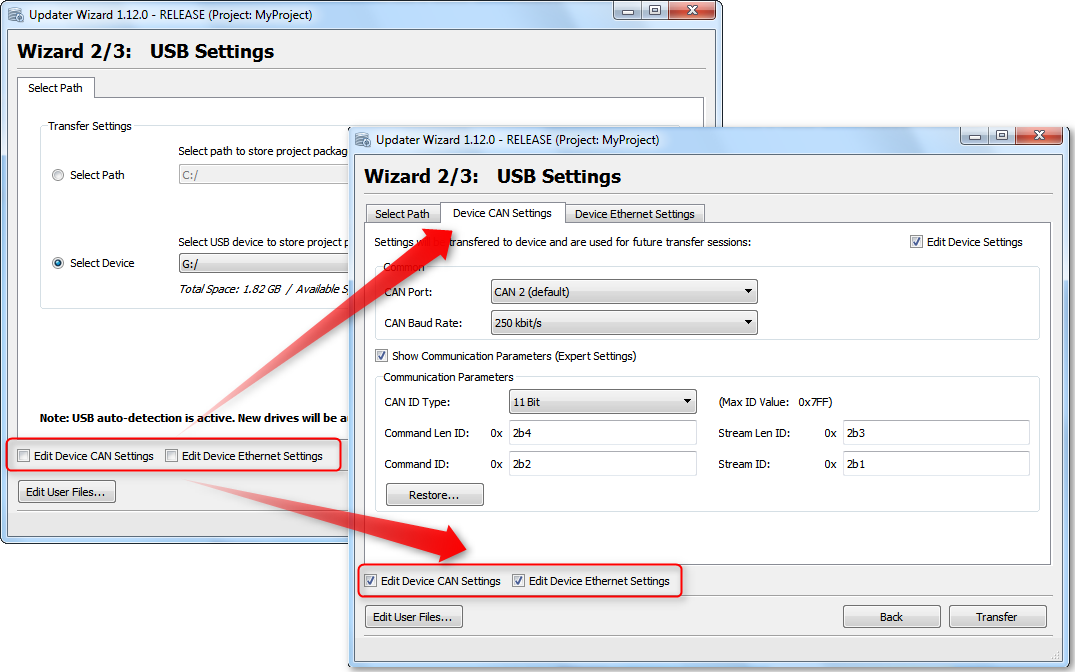
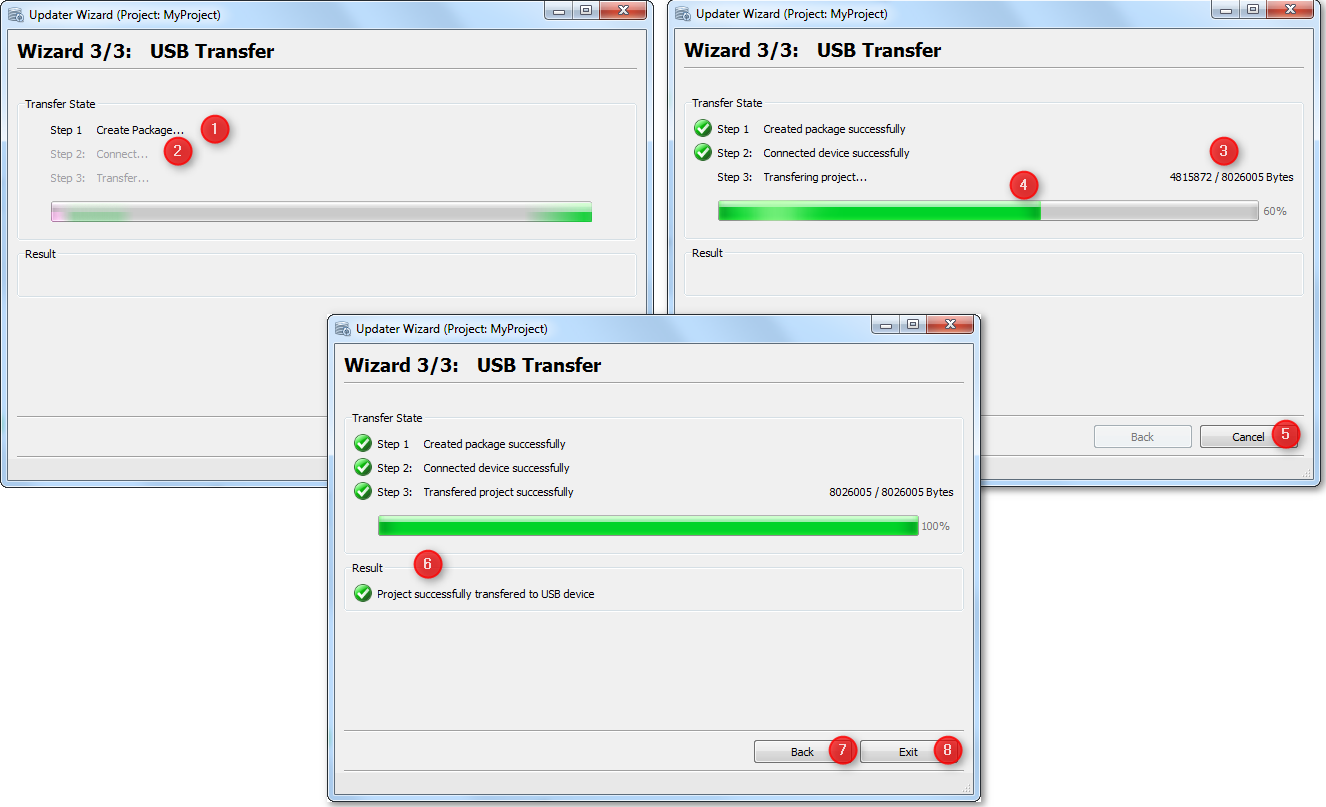
If the CAN Afterwards you can start the transfer.
|
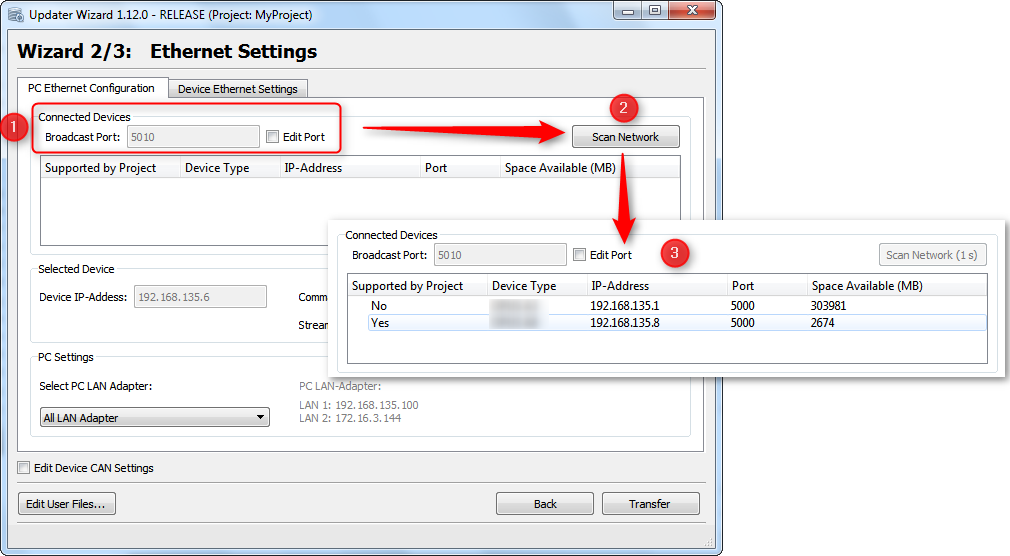
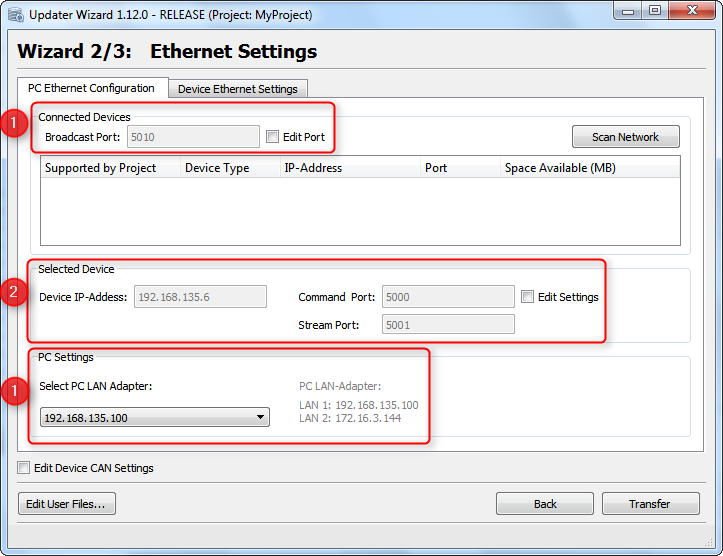
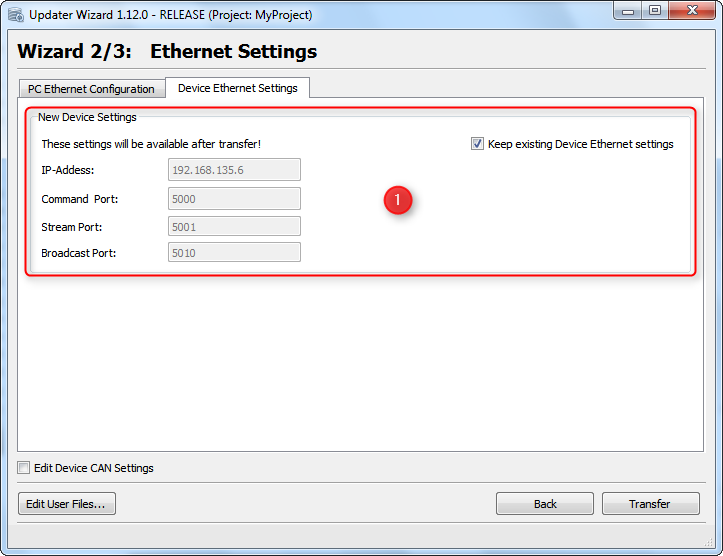
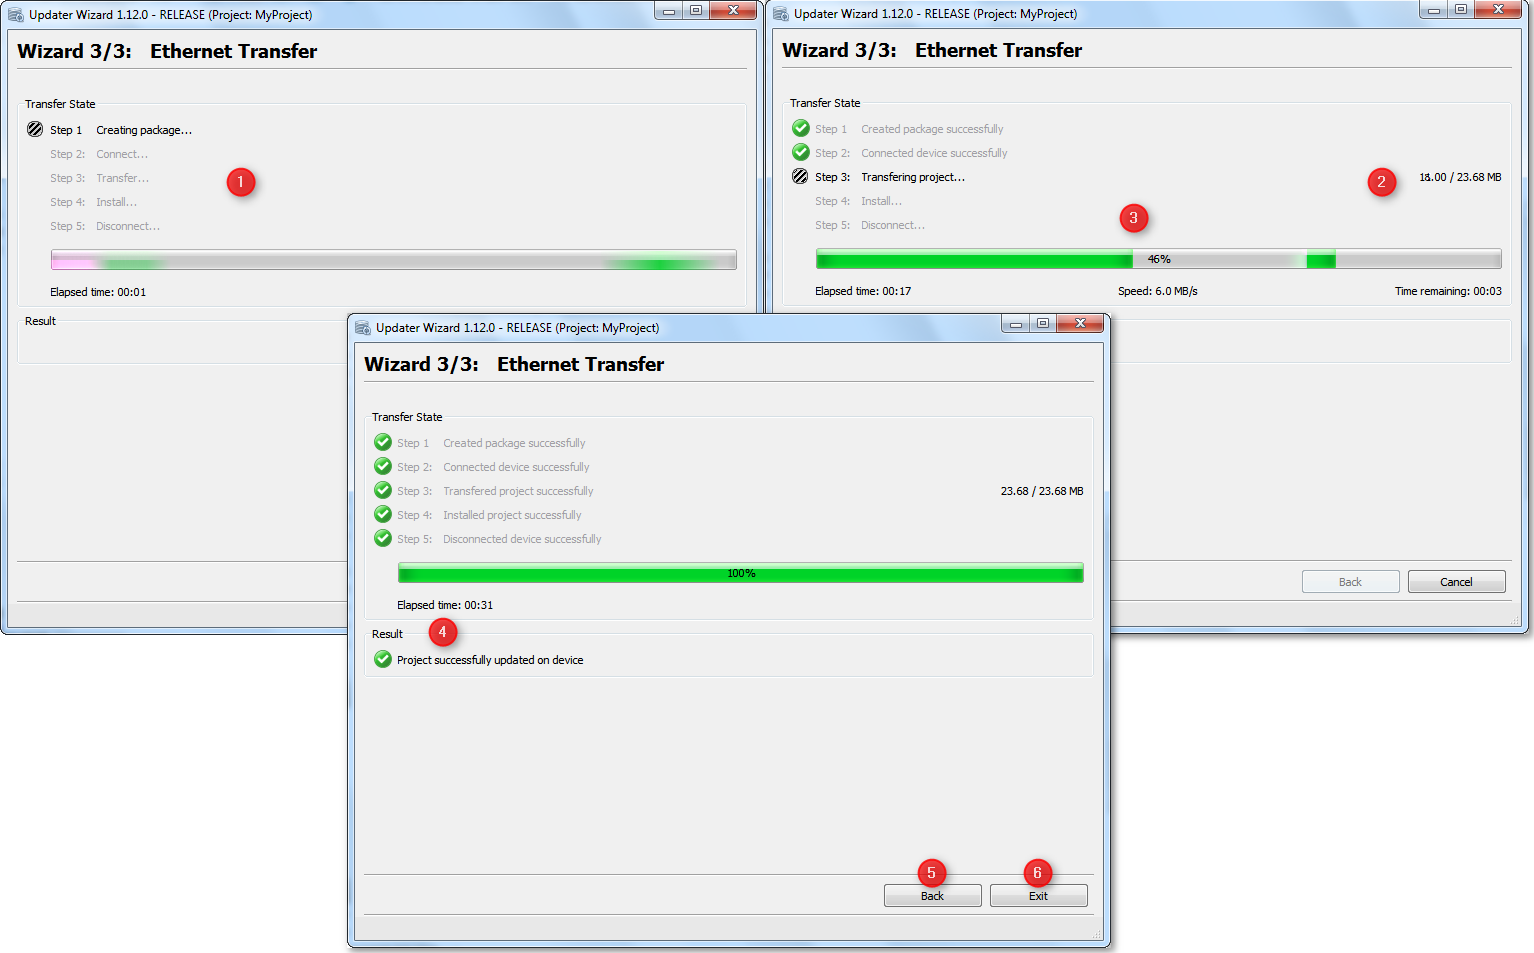
If the Ethernet Afterwards you can start the transfer.
|
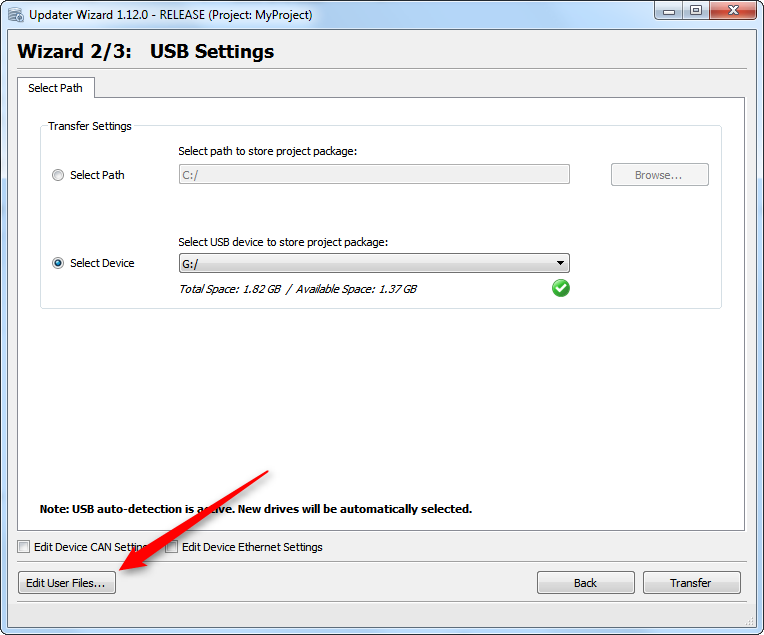
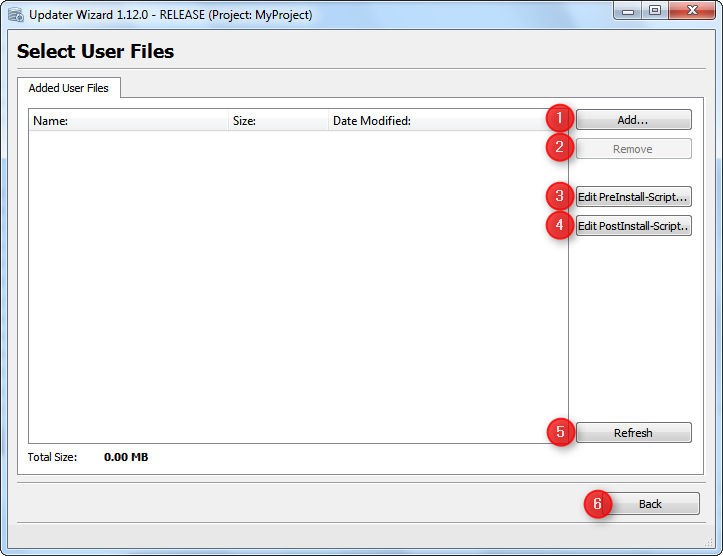
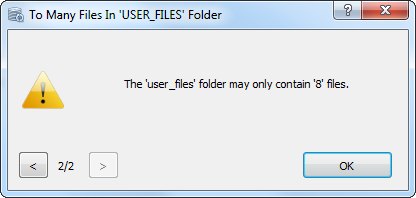
On the pages USB Settings, CAN Settings and Ethernet Settings it is possible to open the page 'Edit User Files'. On this page you can add additional files, which shall be transfered to the device with the current project.
Legend: (1) Add.. button opens a file browser to selecte a file which shall be added to the project package.
(2) Remove button removes selected files from the list. (Only activated if at least one file is selected in the list). (3/4) Opens the Pre/Post-Install scripts in the default application for shell scripts. (5) If the file list is not updated properly, you can refresh the view manually with Refresh button. (6) Back goes back to the last settings page.
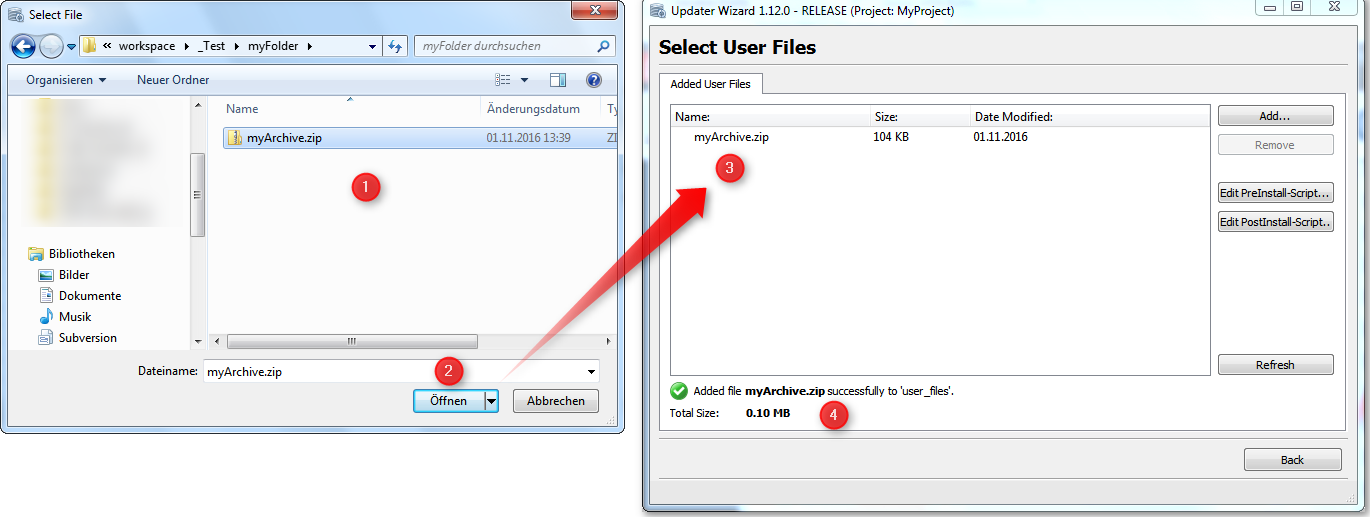
Add FilesWhen the Add... button is clicked, a File Chooser dialog is opend where you can select a file which shall be added to the user files folder.
Legend: (1) Select a file which shall be added to project package. (2) Click on Open to add the file. (3) The file list view shows all files which are added to the user_files folder. (4) The green check shows that the file could be copied to the folder, and below the size of all files shown.
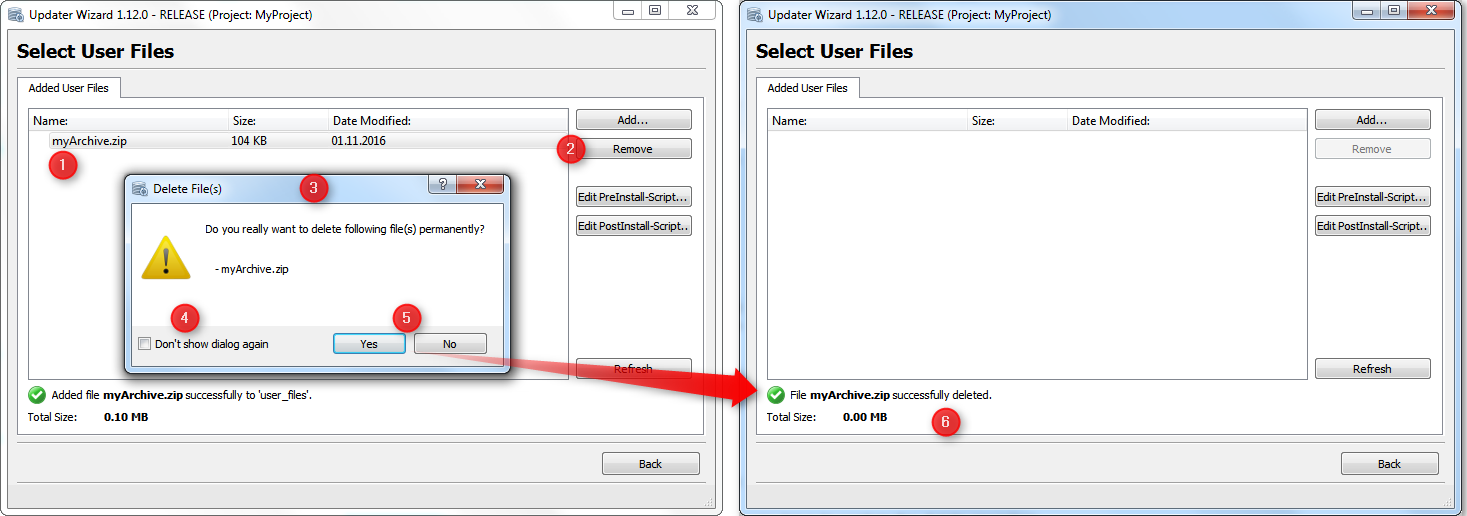
Remove Files
Legend: (1) Select a file which shall be removed from user_files folder. (2) Click on Remove button. (3) A dialog Delete File(s) is shown, where you have to confirm the delete operation. (4) If the dialog shall not be shown again you can check the checkbox Don't show dialog again. (5) With click on Yes the file will be deleted, click on No closes the dialog without an action. (6) After click on Yes, the file will be deleted and the files view is updated.
|
|
The subfolder updater which is located in the project directory, contains the following files: •HostSettings.ini oThis file contains the USB and Device CAN Settings. •preinstall_script.js (included in Project Package) oThis script is executed during Install step on the device before the project is installed. oThis file can be edited by the user. •postinstall_script.js (included in Project Package) oThis script is executed during the Install step on the device after the project was installed. oThis file can be edited by the user. •folder user_files (include in Project Package) oAll files in this folder will be added to the Project Package and will be transmitted to the device. oThe files will be copied during the project install step to the following location on the device: - /opt/pclient/projekte/default_prj/ oThe files are already available in the postinstall_script.shat the above location
|
For each transfer, a Project Package (*.ud4) file is created, which contains all the important files for a project update. The Project Package contains: •Project archive (terminal_files.zip) •Preinstall_script.js •Postinstall_script.js •ClientSettings.xml •files from user_files folder in Updater folder. |
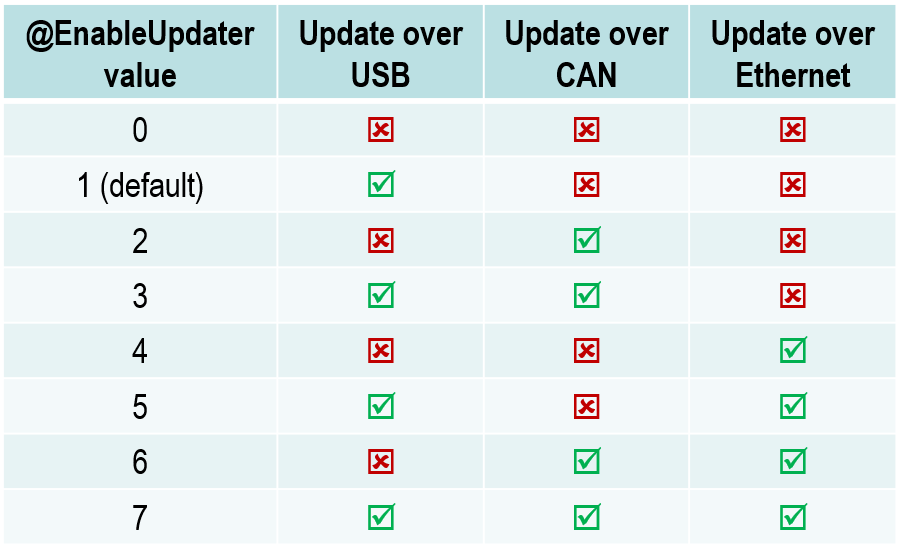
With this variable the ClientUpdater on the device can be enabled or disabled. Additionally, you can set the active interfaces, which allows you to update the project on the device. The following values can be set: •Updater is disabled •0x0 => NO project update can be performed. •Updater is enabled (Single Inteface) •0x1 => Project update can ONLY be performed via USB drive. •0x2 => Project update can ONLY be performed via CAN bus. •0x4 => Project update can ONLY be performed via Ethernet. •Updater is enabled (Multiple Intefaces) •0x3 => Update possible via USB drive or CAN bus. •0x5 => Update possible via USB drive or Ethernet. •0x6 => Update possible via CAN bus or Ethernet. •0x7 => Update possible via USB drive, CAN bus or Ethernet.
|
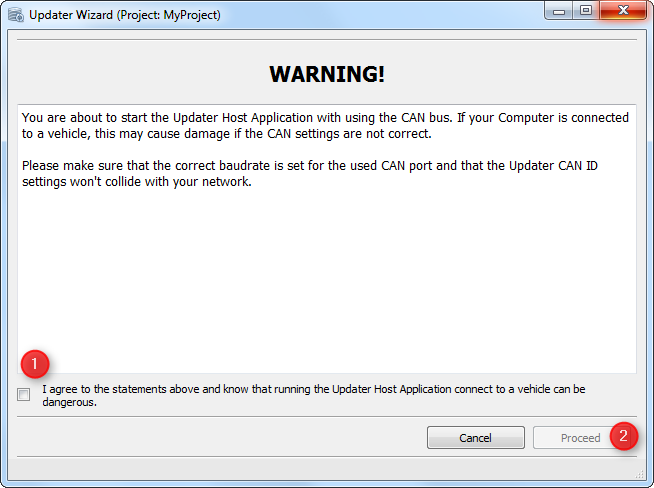
The CAN update is disabled by default on the device. This is important to protect the CAN network and to avoid undesired CAN traffic.
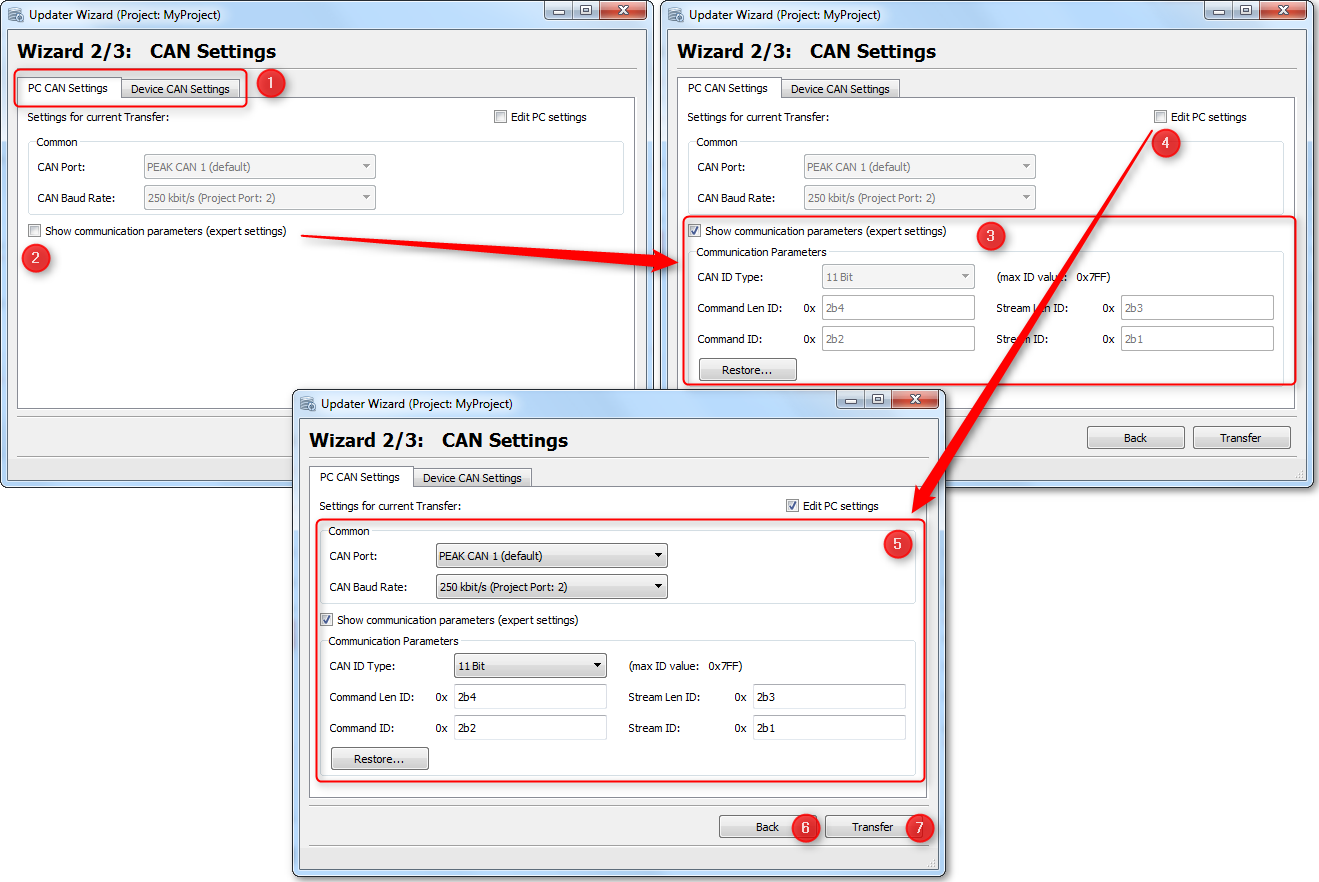
If you want to activate update over CAN please follow these steps: 1.Common: a.Please first read the chapter: Disclaimer about using CAN 2.Project settings: a.If CAN shall be activated, the variable @EnableUpdater must be set properly in the project. The value must be set to 0x2 or 0x3 (Please have a look here) 3.Updater settings: You need to enable the update by changing the @EnableUpdater variable. If the existing project on the device allows such a setting, you can make it on the device. Otherwise: a.The first project update has to be done via USB update. Here you have to check or edit the CAN settings you want to use. b.Transfer project to USB drive c.Update device via USB. Now the ClientUpdater on the device should be enabled for CAN and the CAN Update mode can be used for future project updates. |
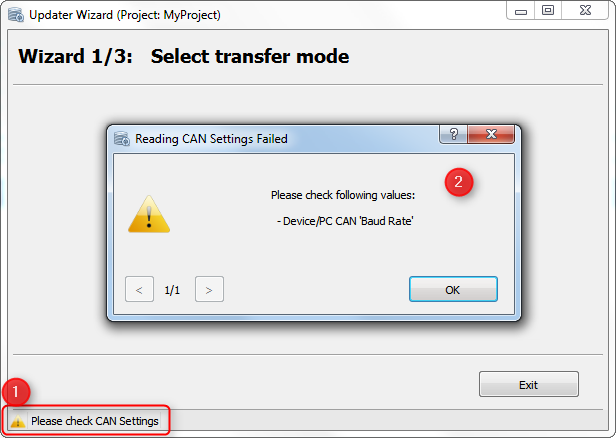
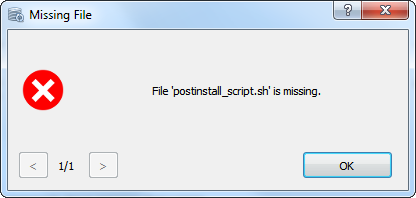
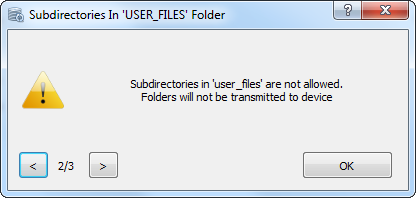
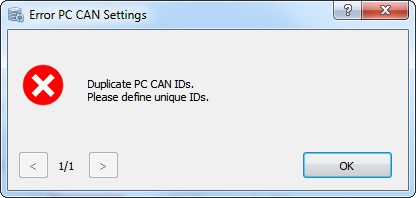
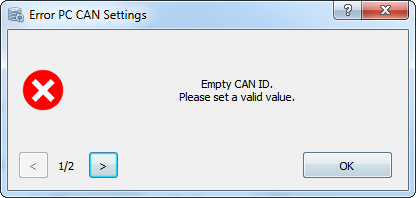
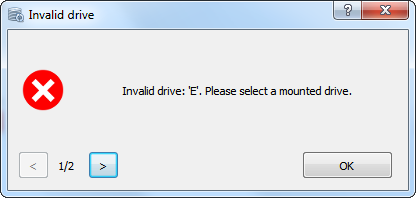
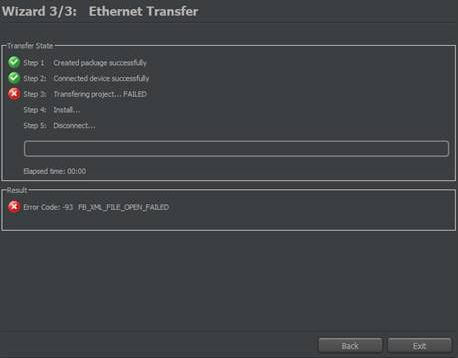
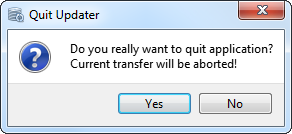
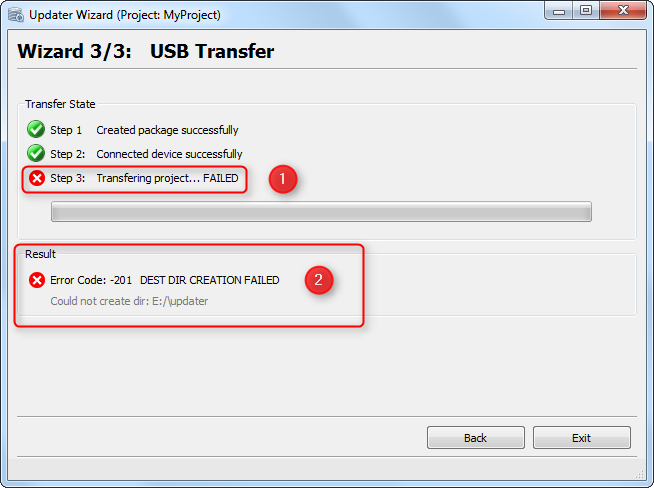
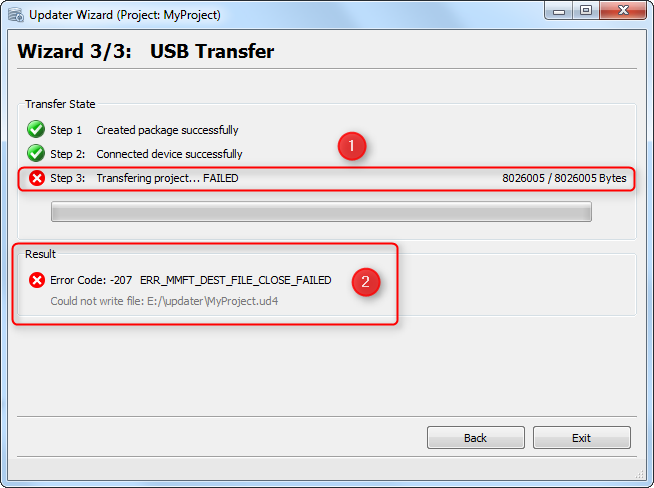
If an error occurs in the Updater application, the warning is shown in the status bar. By clicking the icon or label in the status bar, a dialog with detailed information is shown. All error messages will disable the Transfer button until the error is resolved. Warnings do not disable the Transfer button, but it is recommended to check why the warning is shown.
|
It is possible to start the updater program through a command line.
The updater executable is located in <program_path>\userdir\extracted_components\updater named HostUd.exe There is an example batch file showing how the updater can be started with the user interface. It is also possible to start the updater without a user interface, allowing for an automatic project download to a USB stick or via CAN.
These two lines are mandatory in the batch file for the executable file to find all necessary libraries: set PATH=%PATH%;..\shared_libraries\ set QT_PLUGIN_PATH=%QT_PLUGIN_PATH%;..\shared_libraries\
The executable has the following parameters:
•ProjectPath (required) - the path to the project that should be downloaded - example: ProjectPath=C:\Workspace\Projects\customer_project2 •GUI (optional) - flag whether the updater should start with the gui (true) or silently (false) - example: gui=false •AppName (optional) - A name that will be displayed in the gui title (only considered if gui=true) - example: AppName=MyPersonalUpdater •ShowCANWarning (optional) - Flag whether the CAN warning screen should be shown in the gui (only considered if gui=true) - example: ShowCANWarning=true •interface (CAN/USB)- Defines where the project should be downloaded to (when no gui is used) / which target should be selected in the gui (if the gui is used) - example: interface=USB •path - Defines the target path if the program is used without gui and USB is set as target - example: path=D:\
Example for a download to USB without gui: HostUD.exe projectpath=C:\Workspace\Projects\customer_project2 gui=false interface=USB path=D:\
|
|

 button is clicked on the
 button is clicked on the
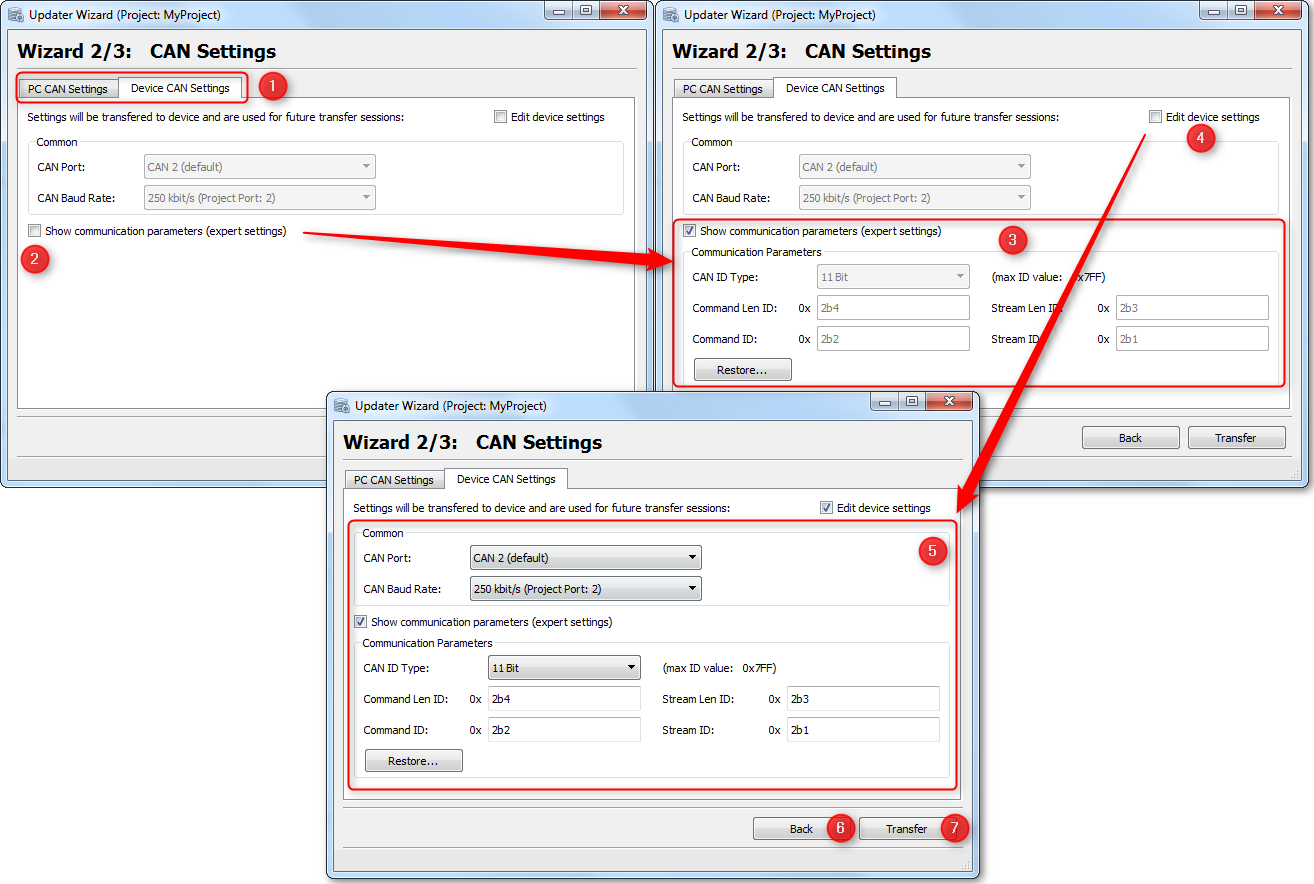
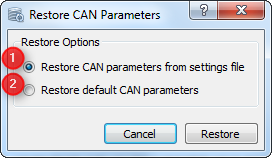
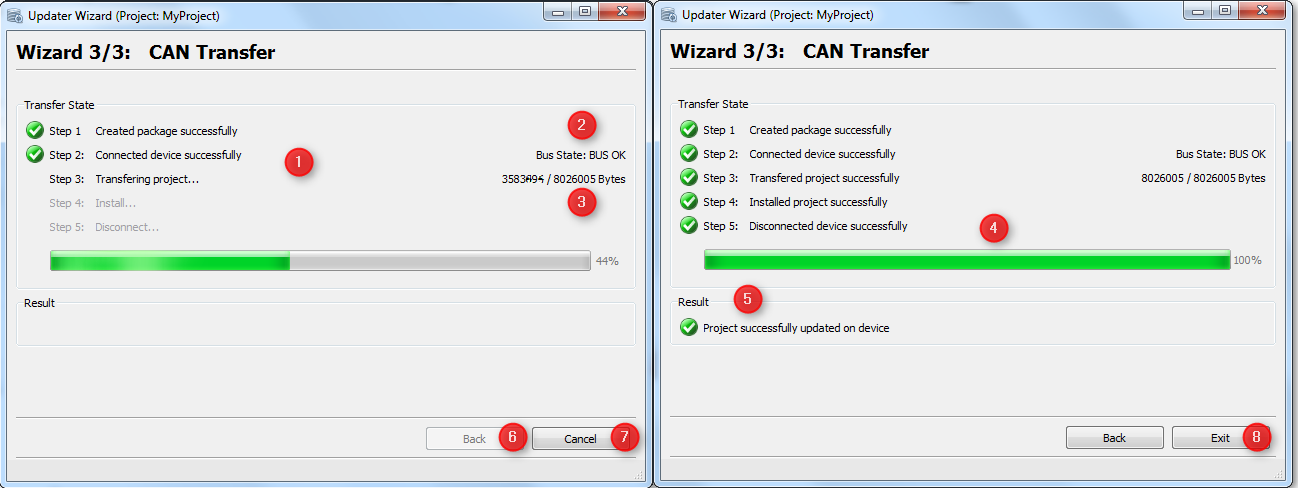
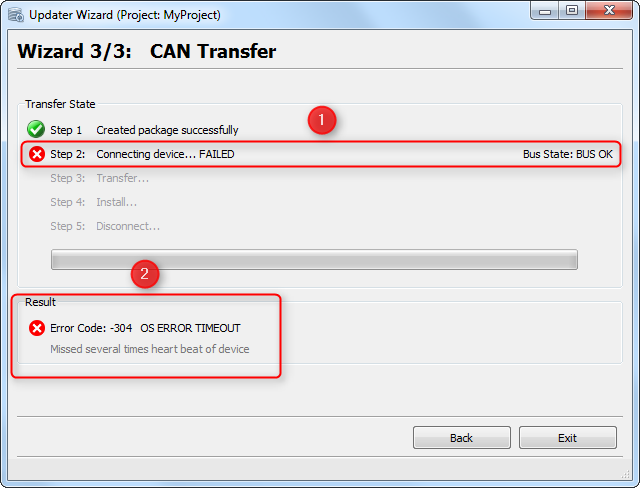
 button is clicked on the