Note: This part of the manual is also available as a PDF to distribute to users: ISOBUS Ready PDF Manual
If you buy an ISO device, this project will be installed by default. It is a plug and play ready project that can be used without any modification.
It is of course possible to modify this project, as the project is available as a sample project in the OPUS Projektor.
Main Screen
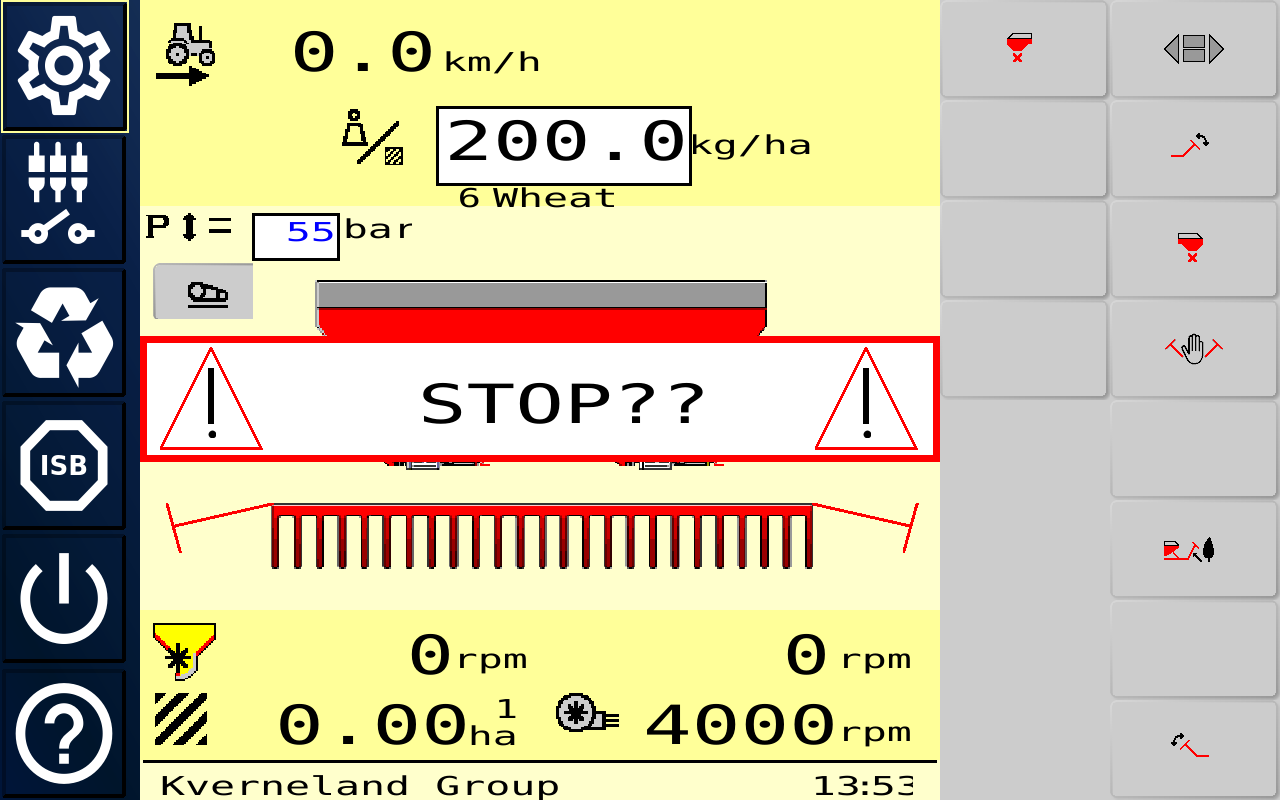
In the center part of the main screen, the ISOBUS pool will be displayed, flanked by the softkey rows on either left, right or both sides, depending on the configuration.
By default, the ISOBUS pool is expected on CAN bus 2. If it is connected on CAN bus 1, the according setting has to be made in the Settings screen.
If an ISOBUS ECU with a pool is connected to CAN bus 2, the pool will automatically be loaded.
The main screen offers the following menu buttons:
|
Settings Screen Press this button to enter the Settings screens |
|
AUX-N screen Press this button to enter the AUX-N Setup screen |
|
Cycle pools Press this button to cycle between ISOBUS pools, if more than one ISOBUS ECU with a pool is connected. |
|
ISB button Press this button to de-activate certain features on the ISOBUS Implement.
|
|
Power button Hold this button for 3 seconds to shut down the device safely. |
|
Help button Press this button to show the help overlay, explaining the available buttons in the project. Hold this button for 3 seconds to make a screen shot that is saved on a USB stick. This functionality requires a USB stick to be connected to the device. Note that you should eject the USB stick on the Boot Logo Settings Screen before unplugging the USB stick. |


Settings Screens
The currently selected Settings screen is indicated with a gray background.
The Settings Screens offer the following menu buttons:
|
Main Screen Press this button to enter the Main Screen |
|
ISO Settings Screen Press this button to enter the ISOBUS Settings Screen. By default, this will be the menu screen that is shown when the Settings button is pressed from the Main Screen |
|
Language / Unit Settings Screen Press this button to enter the Language / Unit Settings Screen |
|
Boot Logo Settings Screen Press this button to enter the Boot Logo Settings Screen
|
|
Miscellaneous Settings Screen Press this button to enter the Miscellaneous Settings Screen |
|
Help button Press this button to show the help overlay, explaining the available buttons in the project. Hold this button for 3 seconds to make a screen shot of the current screen which is saved on a USB stick. This functionality requires a USB stick to be connected to the device. Note that you should eject the USB stick on the Boot Logo Settings Screen before unplugging the USB stick. |


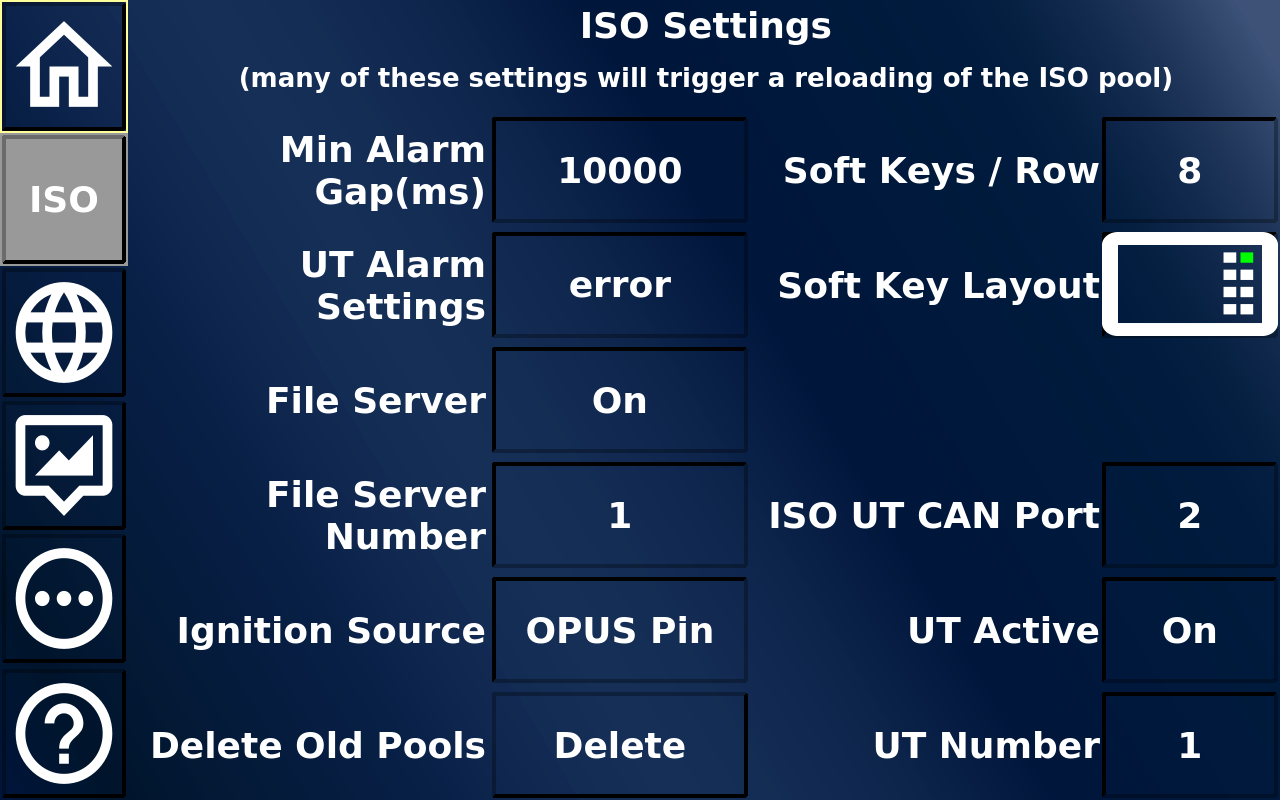
ISO Settings Screen
This screen allows setting many important options regarding ISOBUS:
Min Alarm Gap (ms) |
How much time (in milliseconds) needs to pass for the same alarm to be shown again |
UT Alarm Settings |
What is the minimum severance of an alarm for it to be shown on the screen |
File Server |
File Server On or Off - Enables or disables the possibility of data exchange between ISOBUS devices |
File Server Number |
The number of the device for data exchange |
Ignition Source |
Should the device shut down by its own ignition pin or by the key switch state from the tractor ECU CAN message |
Delete Old Pools |
Press to delete old pools that are stored on the device (the currently active pool is never deleted). |
Soft Keys / Row |
How many soft keys should there be per row |
Soft Key Layout |
Which Softkey Layout should be used (one / two rows left or right or one each) |
ISO UT CAN Port |
Which CAN port is the ISOBUS ECU connected to |
UT Active |
Should the ISOBUS UT functionality be on or off |
UT Number |
The ISOBUS Number of this device |
Language / Unit Settings
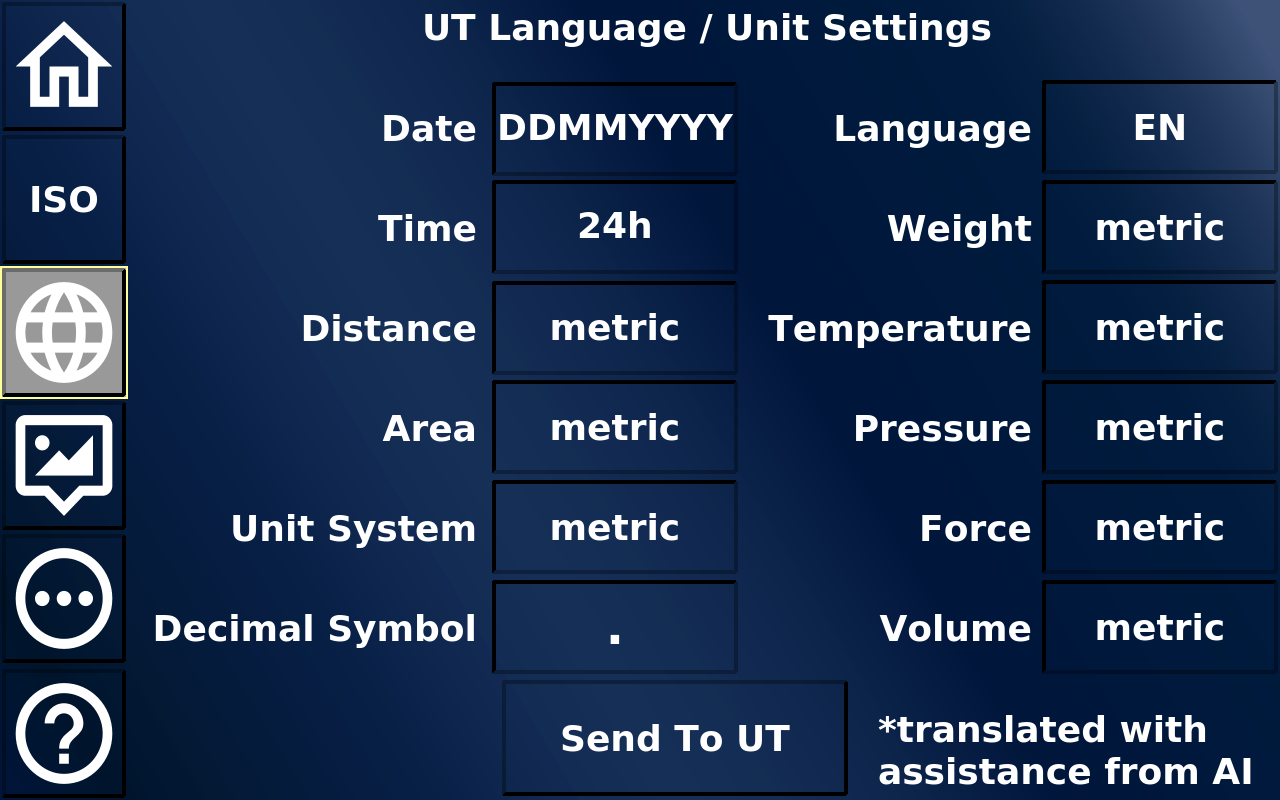
This screen allows making several Unit and Language Settings for the ISOBUS pool. Note that not all settings will have an impact on the pool. This depends on the implementation in the ISOBUS pool (i.e. if the pool does not have a certain language implemented, the language can't be displayed and the default will be used instead).
Also note that most translations were made with help of A.I. tools, so imperfections are to be expected. Please feel free to send corrections for a language that you are fluent in, we are happy to improve the texts in future versions.
Date |
Date display format |
Time |
12 h or 24 h time format |
Distance |
metric or imperial |
Area |
metric or imperial |
Unit System |
metric, US or imperial |
Decimal Symbol |
comma or point |
Language |
Which language should the project and the ISOBUS pool be in |
Weight |
metric, US or imperial |
Temperature |
metric or imperial |
Pressure |
metric or imperial |
Force |
metric or imperial |
Volume |
metric, US or imperial |
Send To UT |
The settings above are only applied to the ISOBUS pool once they are sent to the ISOBUS ECU. This is done by pressing this button |
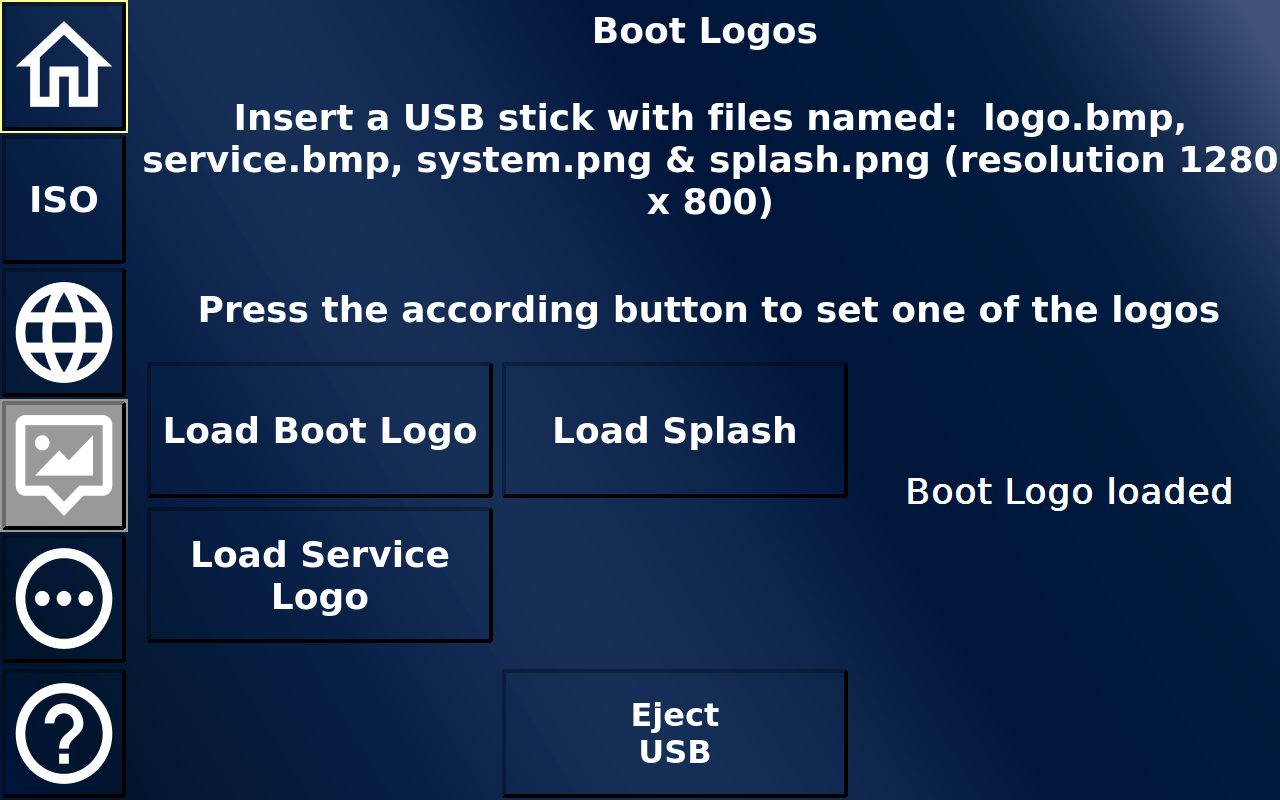
Boot Logo Settings Screen
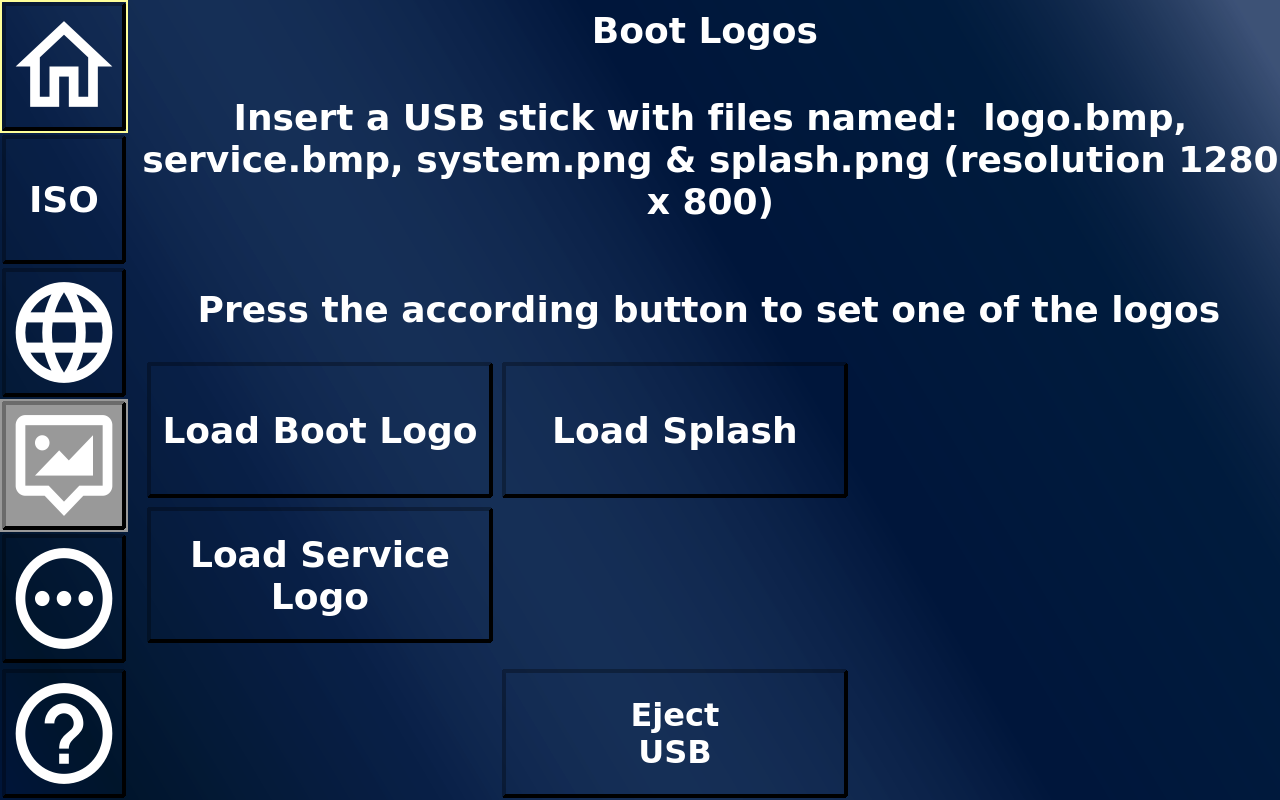
This screen allows setting a different Boot Logo, Service Logo, Splash screen and System Background.
Load Boot Logo |
Loads a Boot Logo file from a connected USB stick. The file has to have the file name logo.bmp to be recognized. The resolution of the file should match the device resolution. The Boot Logo file is the very first image that is shown when the device is powered on in normal operation mode. |
Load Splash |
Loads a Splash screen file from a connected USB stick. The file has to have the file name splash.png to be recognized. The resolution of the file should match the device resolution. The Splash screen is shown when the PClient application has started and the current project is loaded. |
Load Service Logo |
Loads a Service Logo file from a connected USB stick. The file has to have the file name service.bmp to be recognized. The resolution of the file should match the device resolution. The Service Logo file is the very first image that is shown when the device is powered on in service mode (i.e. to update the OS or PClient application). |
Load System Background |
Loads a System Background file from a connected USB stick. The file has to have the file name system.png. The resolution of the file should match the device resolution. The System Background is displayed when the PClient application starts or shuts down. |
Eject USB |
Ejects the USB stick for safe removal. This should also be pressed after screenshots have been stored on it before unplugging the USB stick. |
When loading any of the images successfully, a confirmation message is displayed on the right side of the screen.
Miscellaneous Settings Screen
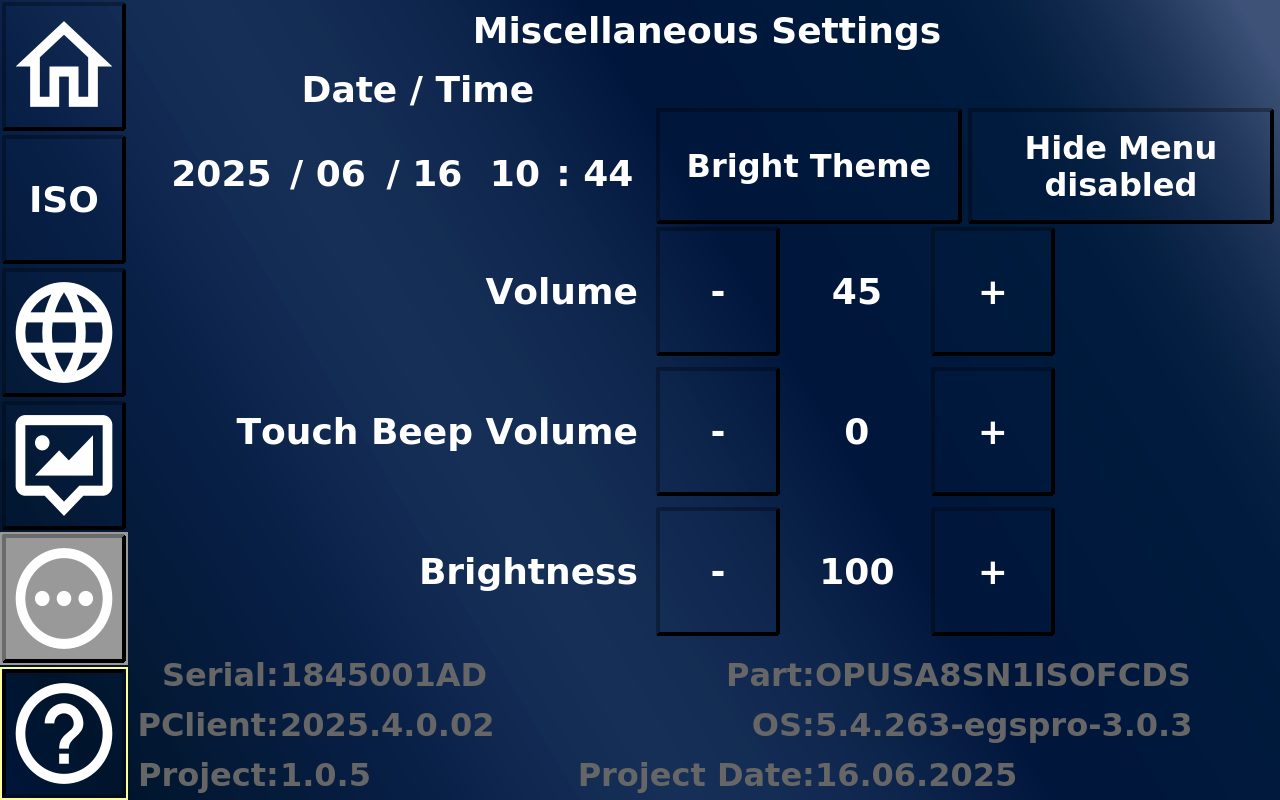
This screen allows making several system related settings.
The whole project (apart from the ISOBUS pool) can be displayed in a dark or a bright theme. The dark theme (with the blue background) is the default.
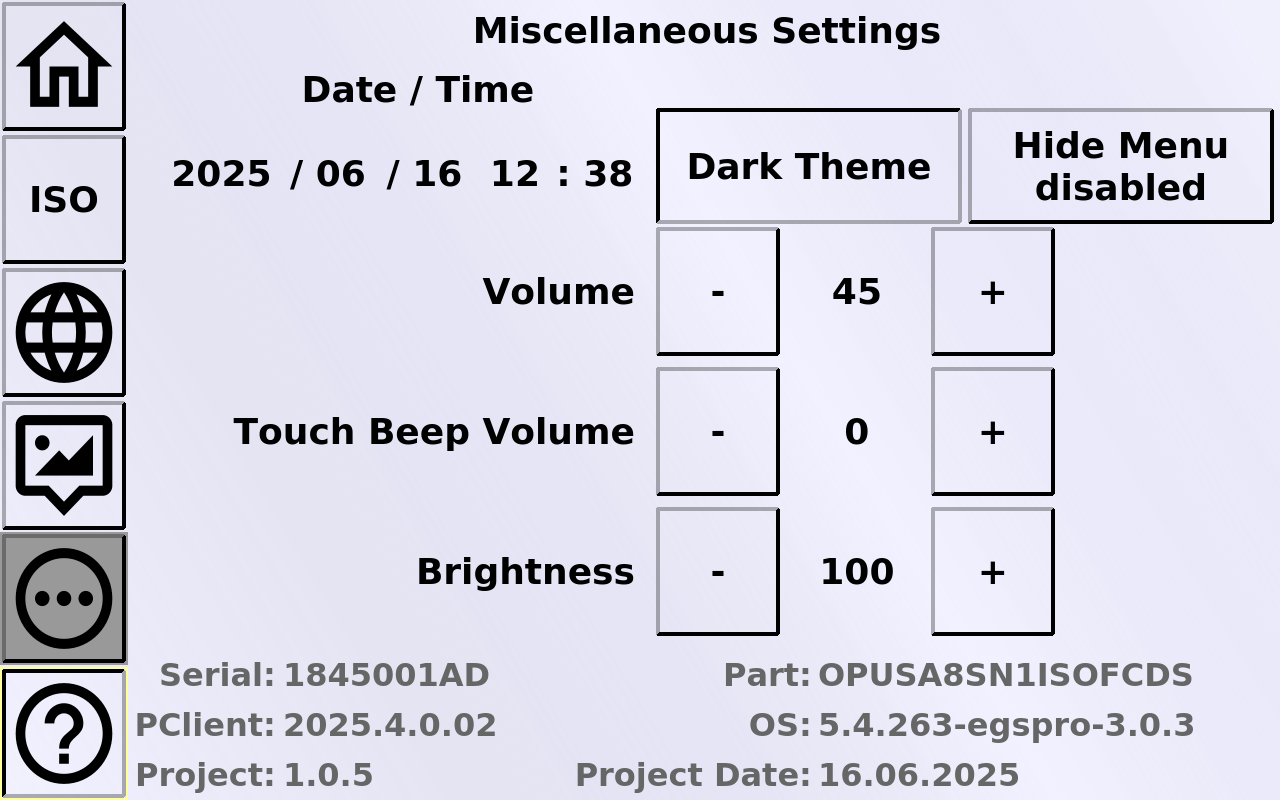

The Themes can be switched by pressing the Bright Theme / Dark Theme button.

The Date and Time are displayed and can be changed by pressing on the according number. This will open a virtual keyboard, where the correct value can be entered.

The Hide Menu button offers the possibility to hide the main menu buttons on the ISO page for a clearer UI. By pressing the button the settings disabled, 3 s, 6 s and 6 s can be toggled.
With any of these settings the menu buttons on the left side will be made invisible after the selected number of seconds. To disable the feature, tap the button until it says Hide Menu disabled again.
With the disabled menu the home screen looks like this:
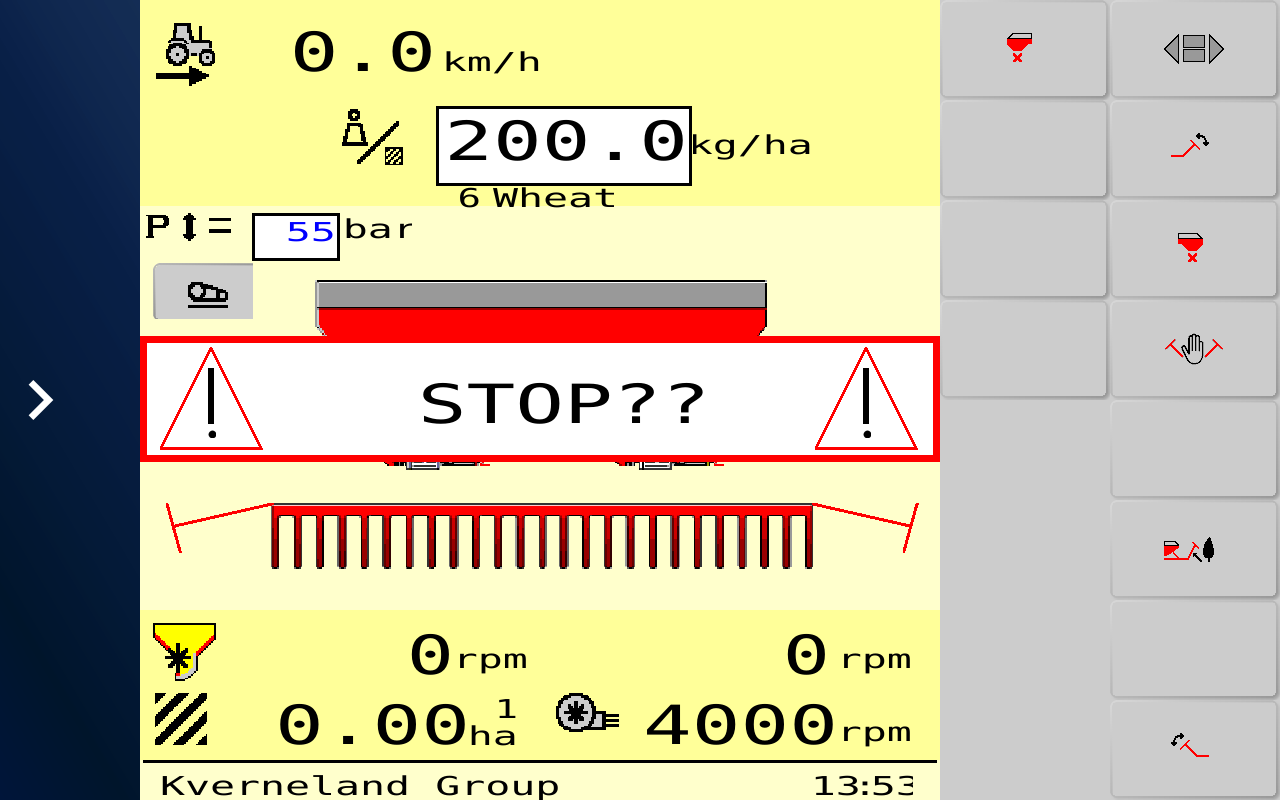
Tap anywhere in the empty region on the left to make the buttons appear again.

The Volume buttons regulate the master volume of the device. There will be a confirmation tone beeping with every change, indicating the loudness of the speaker at the set volume.

The Touch Beep Volume buttons regulate the volume of the general touch beep. With this numeber > 0 the device will beep every time the touch screen is touched, no matter where. Note that this volume is also affected by the master volume setting above, i.e. a master volume of 0 means that there is no beep when touching, even if the Touch Beep Volume is > 0, and a Touch Beep Volume of 10 can be quite loud if the master volume is set to 100.

The Brightness buttons regulate the brightness of the device. The brightness can be regulated between 10 and 100 % (of the maximum value).
In the bottom the versions of PClient, OS and the project, as well as the device serial and part number are displayed. If you have any trouble with a device running this project, please let us know this data so we know which state your project / device has.