Aside from CANFreestyle and J1939 protocol, it is possible to connect the device into a CANopen network. The CANopen stack is implemented on the standard CIA 301 4.2.0 and support the following features: •SDO Communication (Server and Client implementation) oDownload and Upload for expedited and segmented protocol oAbort SDO Transfer protocol •NMT (Slave implementation) oNMT transitions oNMT states •PDO Communication oAsynchronous communication oacyclic and cyclic communication •EDS File
The following Features are NOT implemented: •EMCY Messages •Node Guarding •Block transfer SDO communication •RTR •Sync producer •Auto start •RWR, RWW Access type •Objects |
The following objects are implemented by default in the CANopen stack of the device:
|
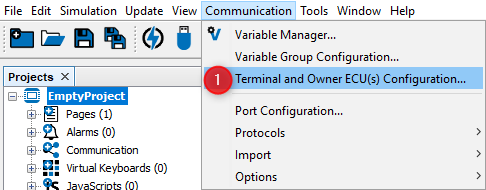
To set up the CANopen protocol go to menu communication-> Terminal and Owner ECU(s) Configuration (1)
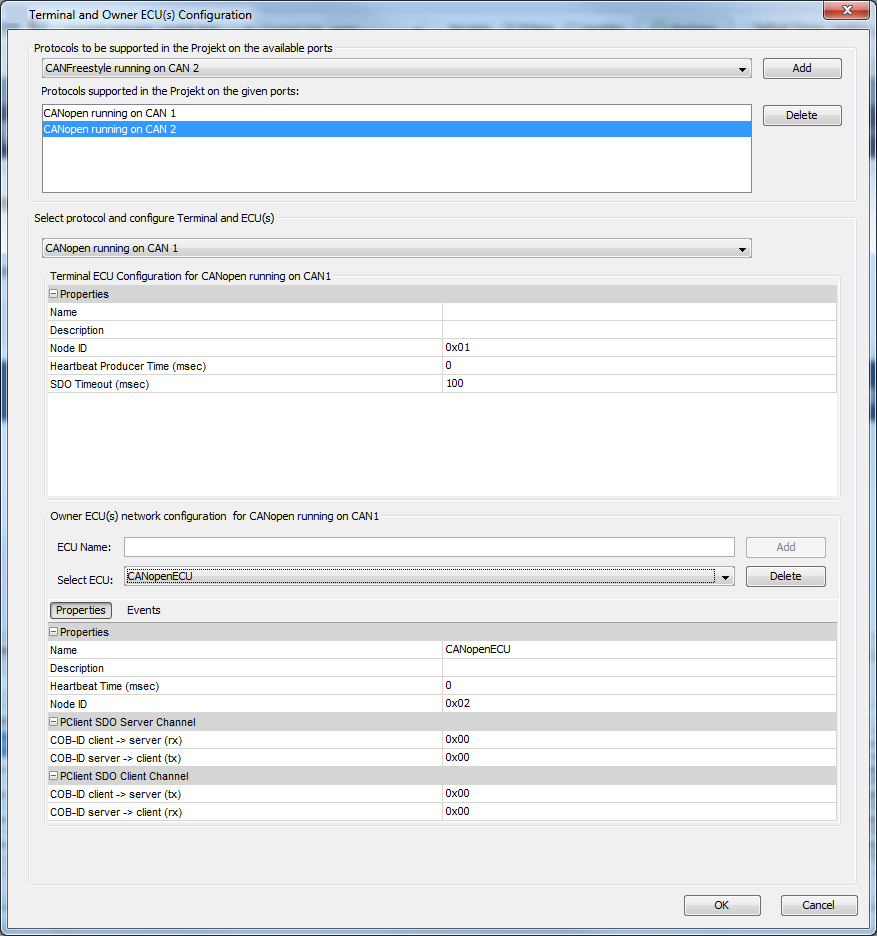
Then the user can choose the protocol CANopen on the desired CAN port
Dialog to set up the CANopen protocol on a device
|
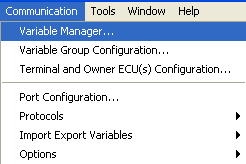
Once the user created a CANopen instance and CANopen ECU, he can create manufacturer objects (CANopen variables). Goto menu Communication -> Variable manager
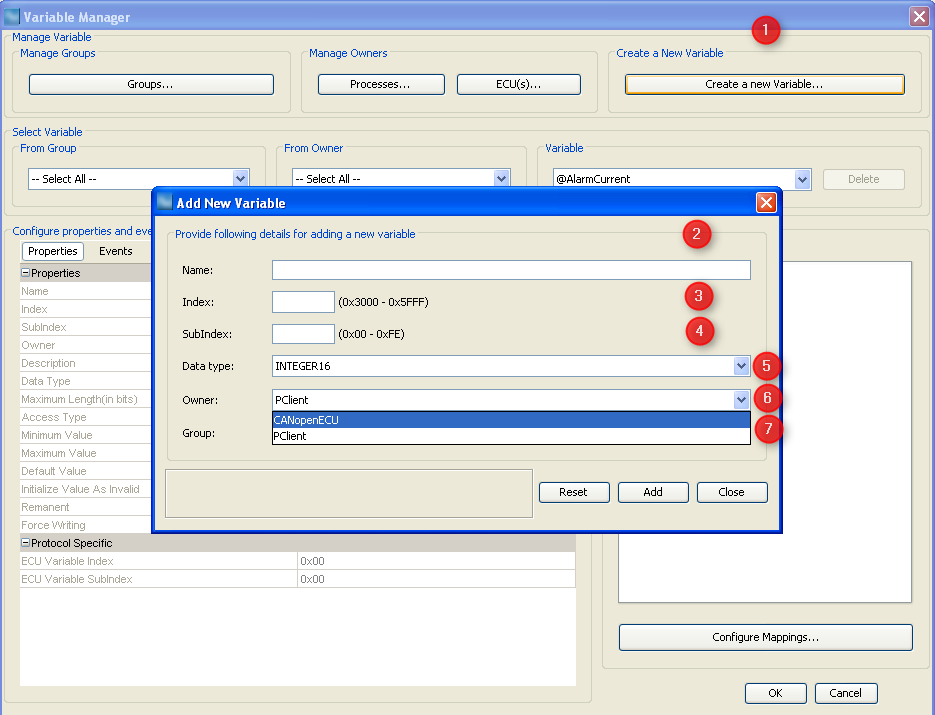
Step1: Press on button Create a new Variable By pressing on this button, the dialog Add New Variable appears. User can configure following properties:
Step 2: By pressing Add the new variable will be created with selected configuration assuming that no issue is existing Step 3: By pressing Close, the dialog Add a new Variable will be closed. Alternative Step 2: By pressing Reset, all default values will be displayed. Step 4: Once closed, other properties/ events can be updated using the variable manager properties / events views.
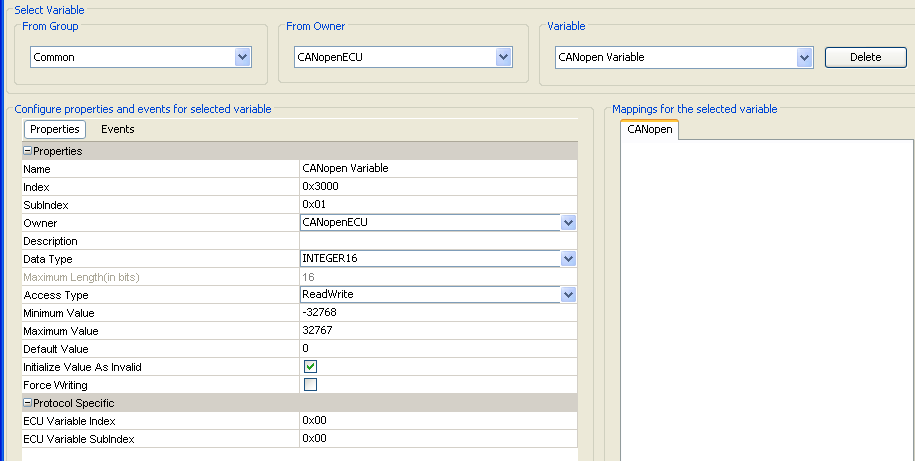
The last created variable will be displayed. User can select an other variable by selection Owner/Group/Variable
Following properties / Events can be configured
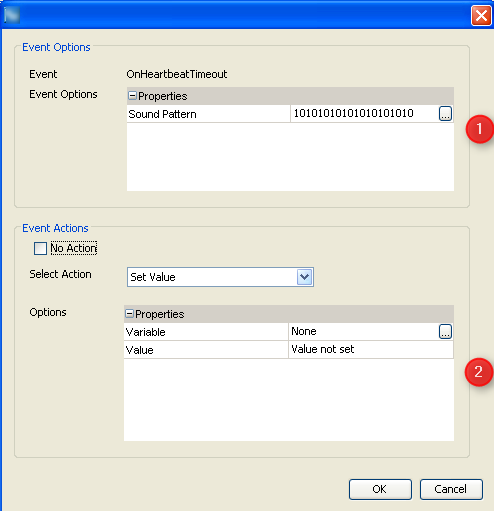
For the new CANopen Device, events can be configured:
|
Once the CANopen protocol instance and CANopen ECU are created, all variables are available from the SDO communication as defined in the CIA 301 CANopen Standard For example: According, the user 's defined a alarm with number 1. To display, the alarm on device, following CAN message will be sent. [601|8| 22 30 24 01 01 80 00 00 ] als Response from SDO Server, the message is sent: [581|8| 60 30 24 01 00 00 00 00 ]
|
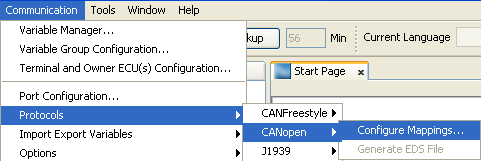
PDO (Process Data Communication) have a length of 8 bytes and they can be configured under
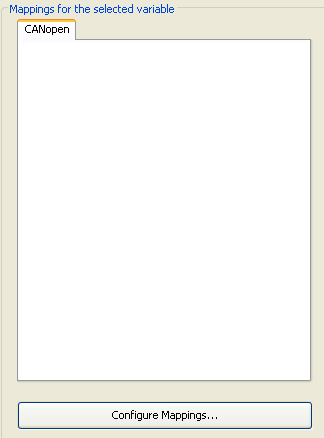
or by pressing the button Configure Mapping... in Variable Manager Dialog
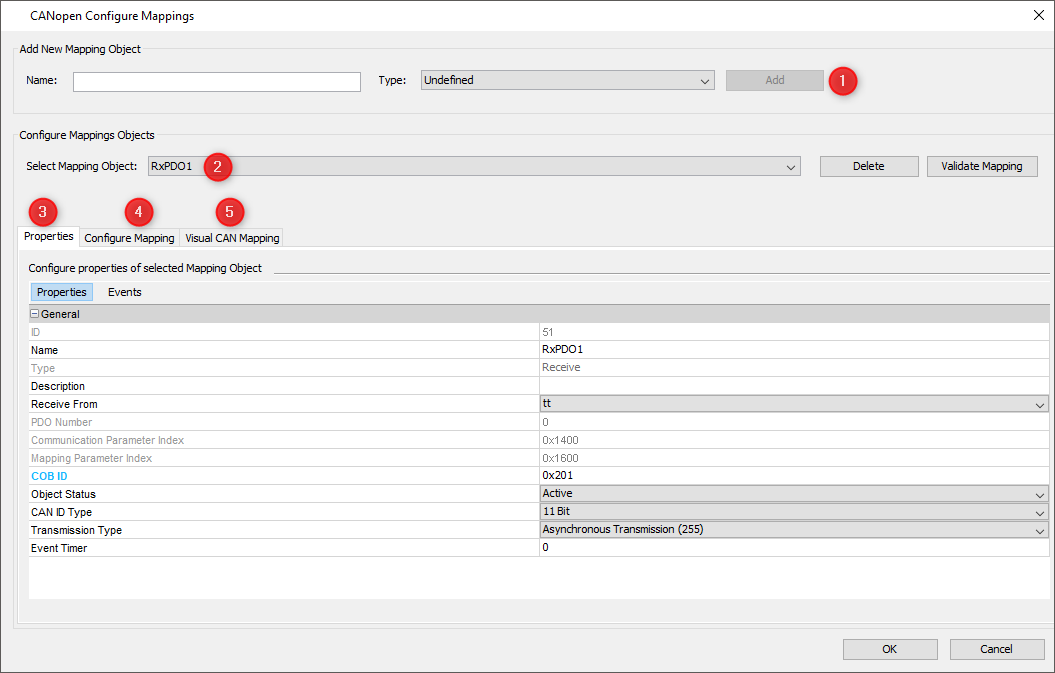
Step 1: Add a new Mapping Object
The user enters a name for the PDO and selects the PDO type Receive or Transmit. By pressing Add , the PDO will be created and appears as selected in the field Select Mapping Object.
Step 2: User selects the PDO
Step 3: User can update the following Properties /Events
* The sync message is sent on COB-ID 0x80 with 0 data bytes.
EventsThis tab allows adding actions to mapping related events. It only appears for receive mappings. The configured actions for the events are executed directly in the CAN thread when the event happens. The CAN stacks will wait until the actions are executed.
OnReceiveTimeOutActionThis event is triggered if a receive mapping is not received within the period defined as "Transmission Period". If this happens all the variables mapped to the PGN are automatically considered invalid and additionally the action is executed. If you should see any "Event Options" for this event - ignore them like the PClient does. Possible actions that can be assigned are •"No Action" which is the default •"Set Value" to assign a constant value to a variable, e.g. to reset a counter, raise an alarm or trigger something attached to a variable where "Force Writing" is true. •"Execute Script" allows to execute a script and provides additional parameter "Execute on every Xth Event" so that it is possible to execute the script only for e.g. every third timeout. OnReceiveTimeOutResolvedActionThis event is triggered if a receive mapping which time out before is received again. If this happens all the variables mapped to the PGN are automatically considered valid again (assuming the PGN received really contained a value for them) and additionally the action is executed. If you should see any "Event Options" for this event - ignore them like the PClient does. Possible actions that can be assigned are •"No Action" which is the default •"Set Value" to assign a constant value to a variable, e.g. to reset a counter, raise an alarm or trigger something attached to a variable where "Force Writing" is true. •"Execute Script" allows to execute a script and provides additional parameter "Execute on every Xth Event" so that it is possible to execute the script only for e.g. every third timeout.
Step 4: Add a Variable to the Variable mapping
In the Configure Mapping tab, by pressing on Add, a new variable can be configured into the variable mapping. Alternatively, the Visual CAN Mapping (5) can be used. Once created, a PDO can be deleted by pressing the Delete button.
The user selects the group and then a variable. The PDO has a maximum length of 8 Bytes. For Saving the PDO, user click on OK. By pressing on Cancel, all changes will be cancelled.
The assignment of Variable into a PDO is depending on the access type of the variables and the owner of the Variable
For variables which belongs to same owner as PDO or PClient, the following rules are implemented:
•WO, RW can be added into Receive PDOs. •RO, RW can be added into Transmit PDOs. |
Under
After few seconds depending on the number of PDO and variables, one or several EDS Files (one per CAN instance) will be generated under the directory of the project. |
