Remote Connection is NOT available on B2 / B2 Plus! |
From Version 2026 of the OPUS Projektor it is possible to connect to the device remotely via an internet connection.
A basic implementation of the Remote Connection can be viewed and tested in the Welcome Project.
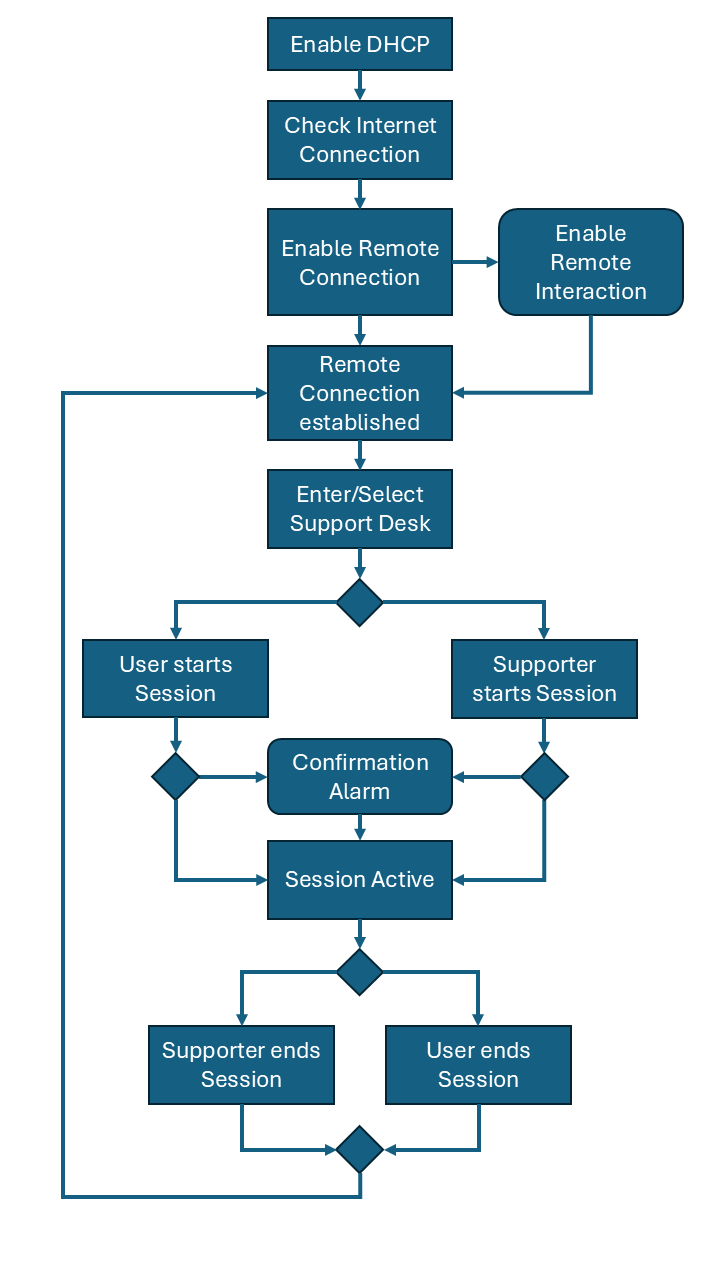
This is the process diagram of the Remote Connection, the steps of which will be explained below.
Check the date and time!
One step needs to be taken prior to anything else. The server won't accept connections that are too far in the past or in the future.
Which means that the date and time on the device need to be set to the current time (remember your time zone as well!).
Enable DHCP
The device needs to be connected to a DHCP server to receive a default gateway. The DHCP server can be in a router or other Internet Access Point.
Without DHCP enabled and an IP address and default gateway given to the device by the DHCP server a Remote Connection is not possible.
DHCP can be enabled with the variable @Ethernet0_DhcpClientEnabled.
Check Internet Connection
Not technically necessary but definitely recommended for a clear communication with the user is a check of the validity of the Internet Connection.
The first step would be to check the variable @Ethernet_HaveDefaultGateway. However, that is not a 100% indicator that the device is connected to the internet.
A more valid check would be to ping a server known to be active. In the Welcome Project a ping to the Google DNS Server is performed to test a valid internet connection.
Enable Remote Connection
With a working internet connection a connection to the remote server can be enabled. This is done with the variable @EnableRemoteConnection.
To check if the connection is established, the variable can also be read. The current status of the connection in general can be monitored with the variable @RemoteConnectionStatus.
With an enabled remote connection, the variable will have the value 2 - connected.
Enable Remote Interaction
It is possible to enable Remote Interaction, which means that the supporter can interact with the device (i.e. "press the touch screen") by setting the variable @AllowRemoteInteraction to 1.
Please note that there is a certain risk involved with this. It is NOT possible to differentiate between a button event on the device or from the remote supporter.
Ideally, any sensitive functionality should check for the variables @AllowRemoteInteraction, @RemoteConnectionStatus and @RemoteSupportAccessActive and prohibit the execution of the sensitive functionality in case the execution could come from a supporter.
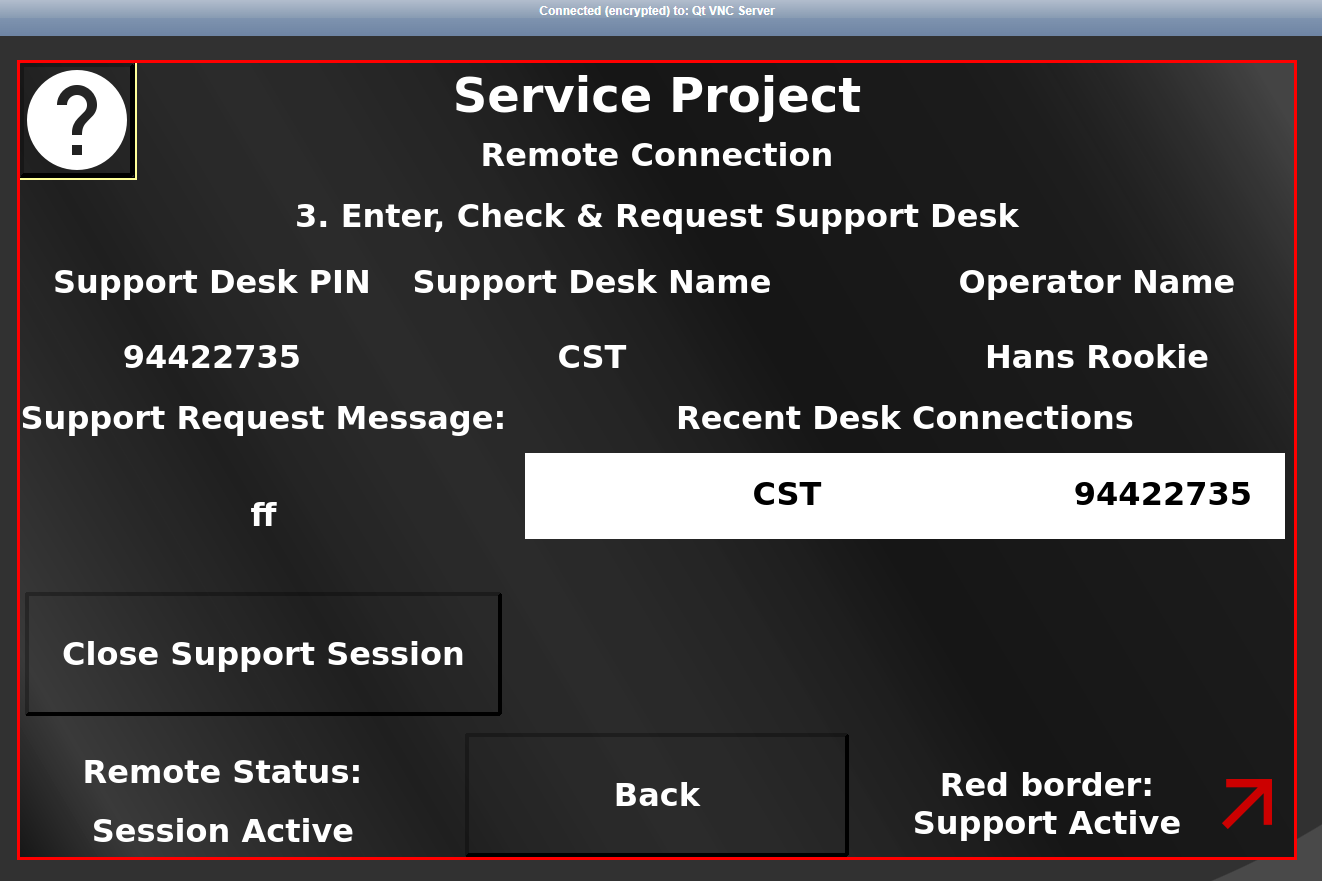
Enter/Select Support Desk
The concrete connection to a supporter is done with so-called Support Desks. A support desk consists of a Support Desk PIN and a Support Desk Name. The supporter knows their Support Desk PIN and will communicate it to the user at the device via phone, text etc.
The user can then enter the Support Desk PIN using the variable @RemoteSupportDeskPIN. When Remote Connection is enabled and a valid Support Desk PIN has been entered, the according @RemoteSupportDeskName can be displayed to verify the connection. Once the Support Desk PIN has been entered, both the user and the supporter can start a support session.
The last 10 Support Desks that were connected to a device will be stored in @RemoteSupportDeskPIN00 to @RemoteSupportDeskPIN09 and @RemoteSupportDeskName00 to @RemoteSupportDeskName09, respectively. Both values can also be shown together in a list and @RemoteSupportDeskIndex can be used to show and select a recent Support Desk.
A chosen Support Desk PIN will be used to try and establish a connection.
User starts session
Once a valid Support Desk PIN is entered, the user can initiate a support session. To do that, they need to send a Support Request Message by entering a text into @RemoteSupportRequest.
When that happens, a Support Request will be shown in the Remote Support Desk application on the supporter's computer.
The supporter can then connect to this support request by entering an optional message and connecting to the device. The message will be displayed in the variable @RemoteSupportRequest.
Supporter starts session
If a Support Desk PIN has been entered or chosen in the connected device, the supporter can also initiate a support session by connecting to the device and entering an optional request message. The message will be displayed in the variable @RemoteSupportRequest.
Confirmation Alarm
It is recommended to create an alarm to confirm support requests. Both when the user or the supporter initiate a session, at the end an alarm can be shown for the user to finally allow the support session. For this to happen, the variable @RemoteSupportAllowSessionAlarm needs to be set to a valid alarm number. The alarm could show the request message, the Support Desk PIN and the Support Desk Name.
If the variable is not set to a valid alarm number, this step will be skipped and a support session will be established.
Session Active
The active session will be indicated by a red border surrounding the edge of the screen. Additionally, the state can be read in the variables @RemoteConnectionStatus and @RemoteSupportAccessActive.
Supporter ends Session
The supporter can end the session by closing the browser window that shows the virtual screen. The closing of the session will be indicated in the project with the variables @RemoteConnectionStatus and @RemoteSupportAccessActive.
User ends Session
The user can end the session by setting @RemoteConnectionStatus to 1 (connected) or 0 (disconnected). Note that by setting it to 1, the session will be ended, but the Support Desk will stay connected. Setting it to 0 ends the session and unpairs the Support Desk and the device. The supporter cannot connect to the device at that moment, and if the device should be connected again, the Support Desk PIN needs to be re-entered or the Support Desk needs to be chosen from the recent support desks.
PC Application
The other side of the remote connection is the Application on the PC side.
For the remote connection a Support Desk account has to be created. Please contact your vendor for information how to do that.
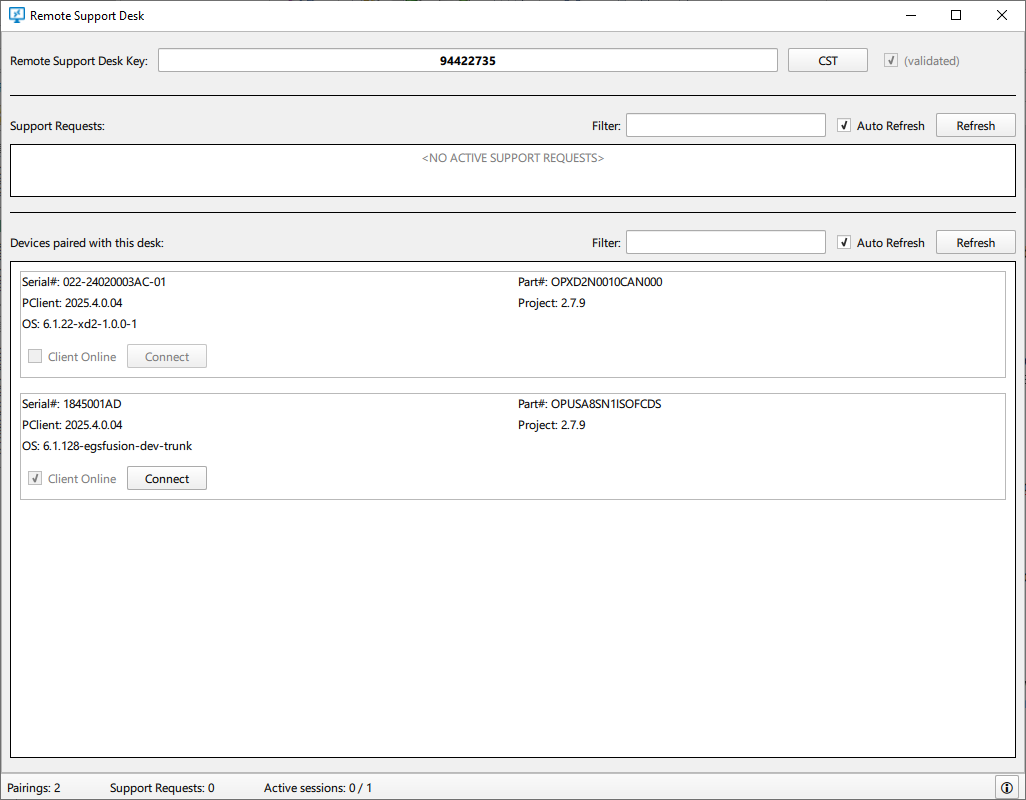
The application is divided into three parts.
Remote Support Desk Key
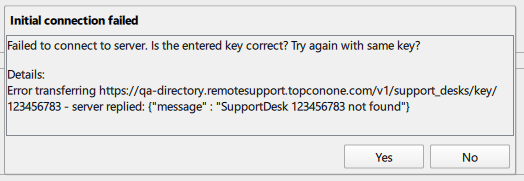
In the upper part the supporter can enter their Remote Support Desk Key. Confirm the key by pressing Enter. The Application will then check the validity of the key.
If an invalid key is entered, an error message appears.
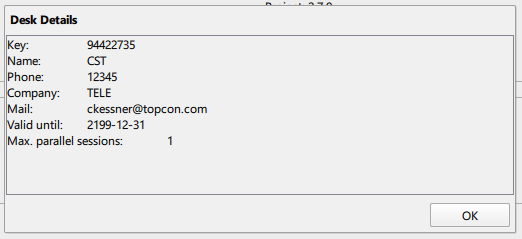
If a valid key is entered, the Support Desk Name will be shown on the button next to the entered key. A button press on that button shows the account details of that supporter.
Support Requests
In the middle part the current support requests from devices are listed.
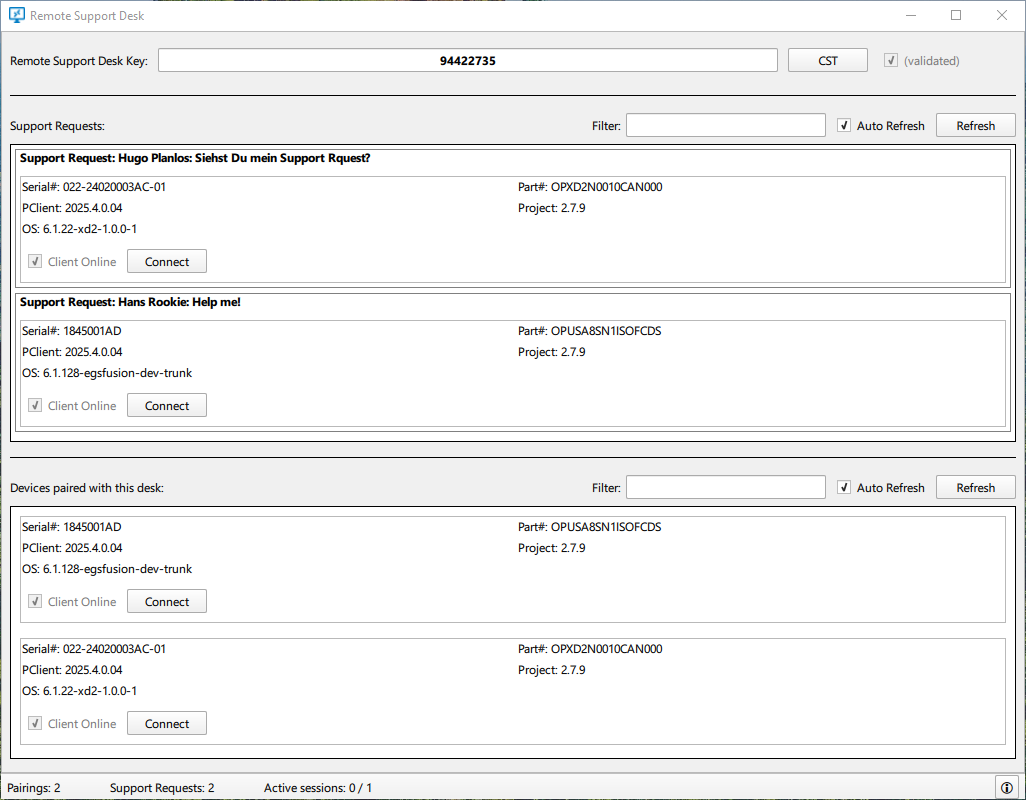
To refresh this list, either click on the Refresh button or enable Auto Refresh.
Devices paired with this desk
Once a remote connection has been made by a supporter, the device will be stored and listed in the bottom part of the application. It is shown whether a device is online and a connection can be made.
The device list shows detailed information about the device, its software (PClient, OS and project version) the operator at the device and the support request message that the operator entered on the device.
The supporter can connect to a device by clicking on Connect, either for a Support Request (initiated by the operator) or from the list of paired devices.
That will open a pop up asking for an (optional) message that will be shown on the device if a remote connection alarm is set up (which we recommend!).
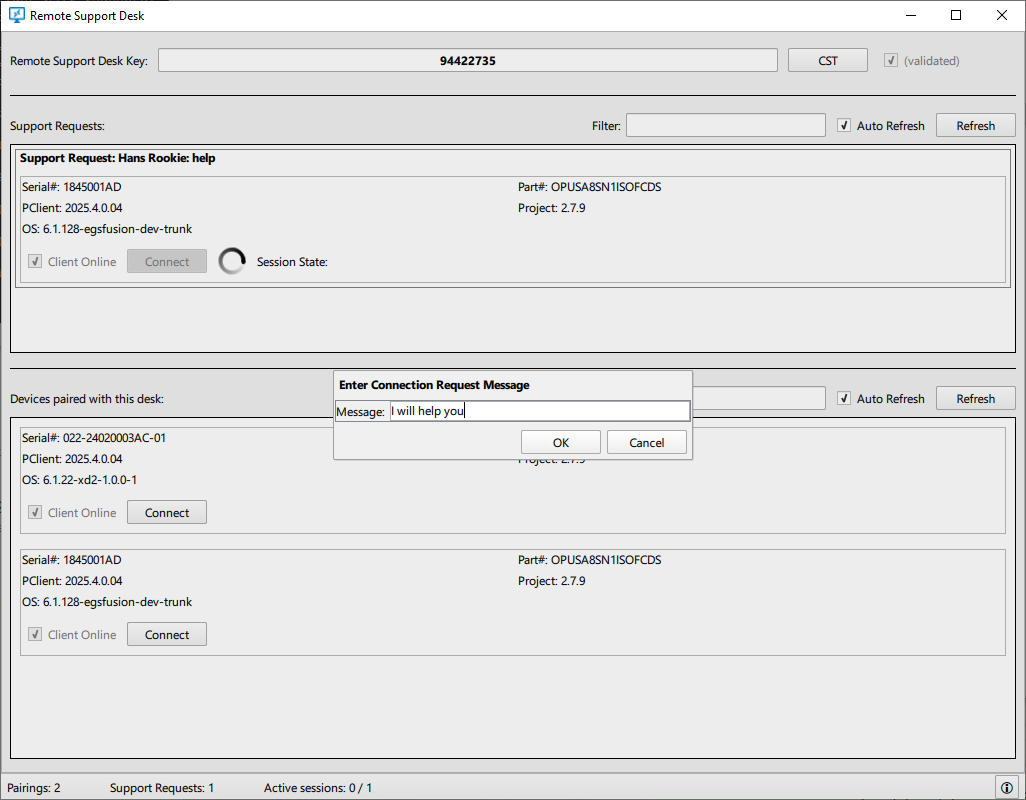
Press OK to connect to the device.
If the connection is established successfully, a browser window will open which shows the screen of the connected device.
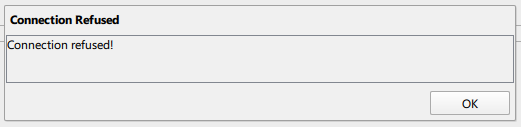
If the operator refuses the remote connection on the device, a message will be displayed in the Remote Application.
Once the browser window is open with the remote connection, the Remote Application could be closed, it is not needed for the current support session.
The support session can be ended by the operator at the device or by the supporter at the PC.
In both cases the same message will be displayed in the Remote Application.
Note that it is not displayed which party has stopped the support session. It is to be assumed that if the supporter didn't stop it, the operator at the device did, and vice versa.
Note that a connection to the device is only possible if the desk does currently not have another active support session.