The first step to update the device is to copy the update files on a USB stick. The USB stick has to be FAT32 formatted with only one partition.
Copy the OS files and/or the files for the application that should run on the device into the root folder of the USB stick. The USB stick may contain other data, which is okay, they will be ignored. You can find the update files in the extracted zip file that you downloaded / got on your USB stick.
In Windows, the user.tar files are often shown as zip files. Never unzip these files or the update won't work! |
For OPUS Projektor: The update files for the devices are included in the Projektor Tool. Go to the menu Update -> PClient / OS Update. In the dialog you can choose for which device you want to copy the OS and PClient files on the USB stick.
For Codesys: \CustomerFiles\Device\EGSPRO
Power off the device and connect the USB stick with the update files with the USB port of the device (both the front USB slot and the USB cable from the main connector can be used).
There are three ways to start the device in update mode, you can use either one of them (but you don’t need to do both!):
a)Connect the clamp “Serv_EN” (service enable) with clamp 15 and 30 and then power on the device.
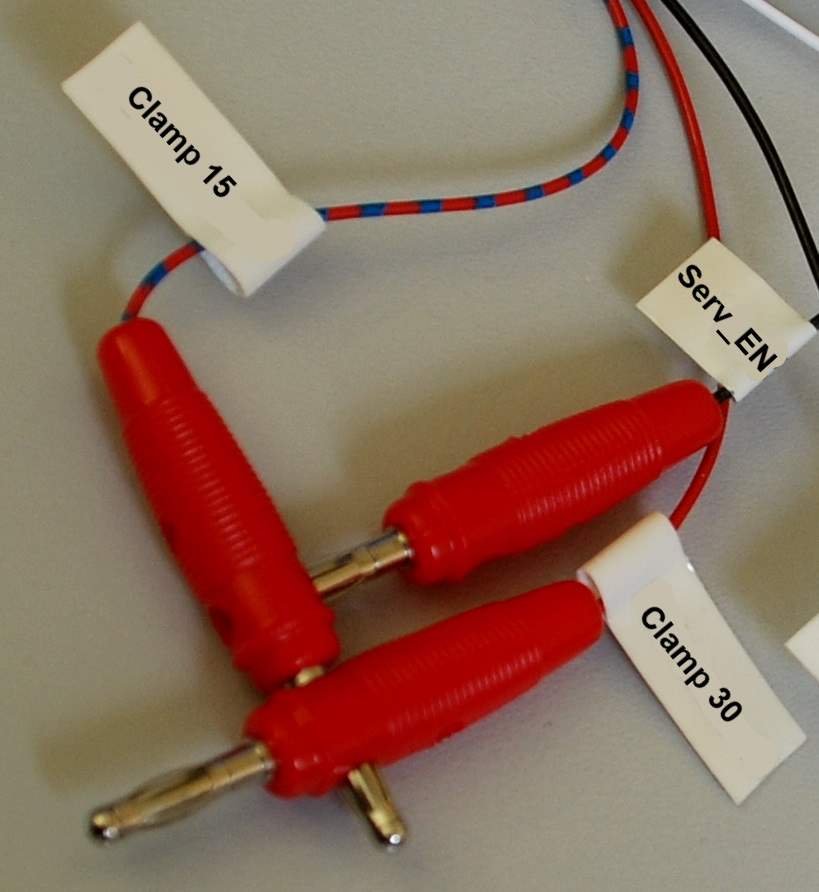
After some seconds a screen with “Maintenance” will be displayed. At this point please disconnect the clamp “Serv_EN”, otherwise the update will be done again after restart.
b)Press the left keys 1 and 2 and then power on the device while holding the keys (works only if you have a product version with keys).
For the OPUS A8, press the first softkey and the STOP key.
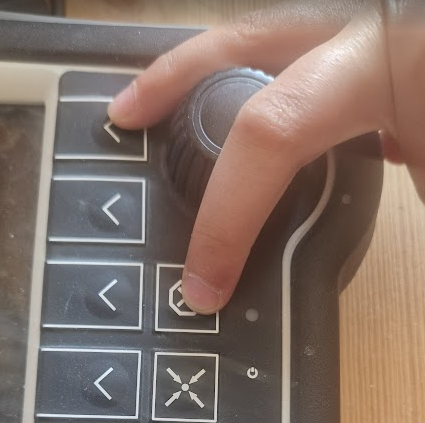
After some seconds a screen with “Maintenance” will be displayed. At this point you can let go of the keys.
c)Use the Welcome Project (only for devices with the PClient installed)
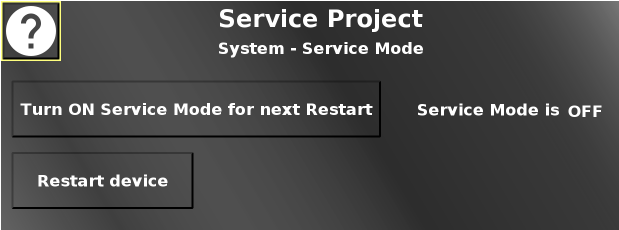
To activate the service mode via the pre-installed Welcome Project, navigate to the screen Service Project -> System -> Service Mode
There press the button "Turn ON Service Mode for next Restart" to activate service mode for the next restart. Next to the button will be an indicator if service mode is currently set (initally it will say "Service Mode is OFF". After pressing the aforementioned button, it will say "Service Mode is ON".
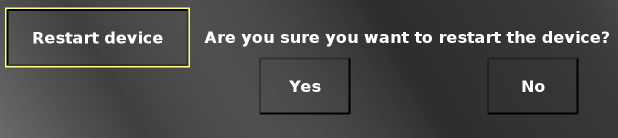
Below that button is a button "Restart device". Press this button to restart the device (in service mode if it was configured like that above). A confirmation dialog is shown to confirm that the device should be restarted. Press "Yes" to restart the device.
After some seconds a screen with “Maintenance” will be displayed. At this point please disconnect the clamp “Serv_EN”, otherwise the update will be done again after restart.
Let the update run through completely. Don’t disconnect the power when the reboot countdown is displayed |
The service mode can also be reached via software, i.e. you could integrate a "start into service mode" functionality in your project. Please check the corresponding application documentation for details.
With a new device you can set the flag directly in the default project. For a PClient device navigate to Service Project -> System -> Service Mode. For a Codesys device navigate to Daemon -> HMD -> Bootmode.