You can connect to the serial console of the device to change the boot logo, read debug and error messages and copy files and folders.
You need to connect your computer to the RS232 interface of the device, either directly with an RS232 cable, if your computer has the according connector, or with a RS232 <-> USB cable.
You can use any shell program, such as HyperTerminal (only up to Windows XP), PuTTY or TeraTerm VT (both free and open source).
These are the settings you need to make in your software:
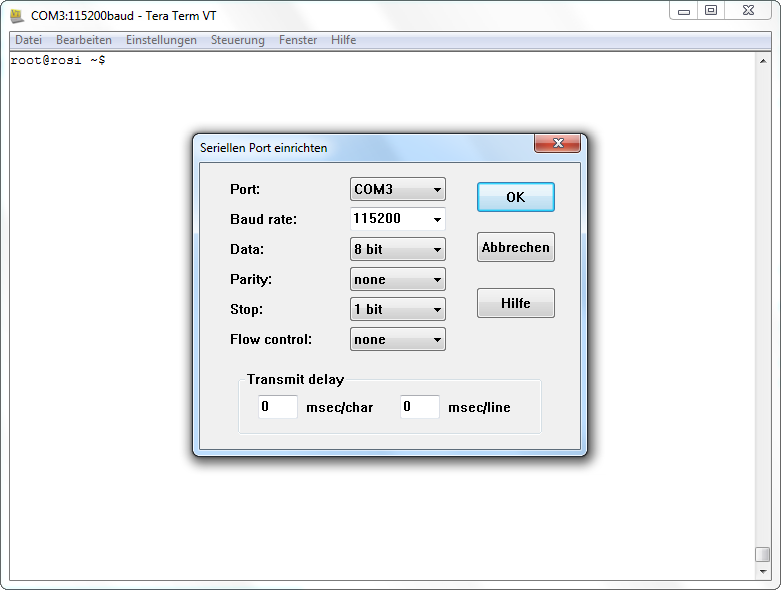
The COM-Port can differ depending on your system.
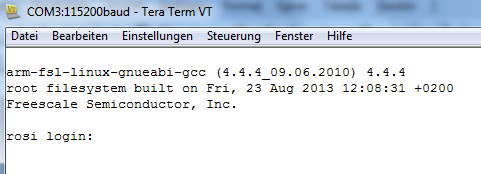
If you start up the device with the console connected, you will see a lot of startup messages. If you connect while the device is running, you might not get any messages at first. Just press enter to get the login dialog:
Here are the login parameters:
login name: root
password:
for A3 -> opusa3
for A6 -> opusa6
for A8 -> egspro
for A6 G2 -> egspro
for B3/B4/B6 -> egscore
for B2 -> opus-b2
After logging in you will see a screen similar to this (it differs from device to device):
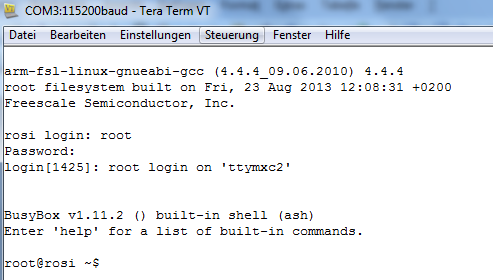
Now you’re logged into the Linux system on the device and you can execute commands.
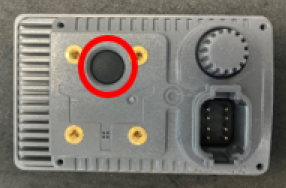
OPUS B2
The OPUS B2 / B2 Plus does not have an RS232 connection on the main connector.
Instead, Topcon offers a service adapter to allow a serial connection.
To mount the service adapter, carefully remove the service seal.
Then you can insert the service adapter into the opening.
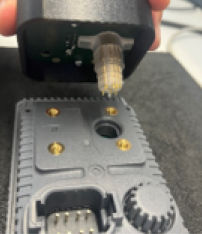
Make sure that the holes in the adapter align with the threads on the device.
Now screw the adapter in place.

Finally, connect the RS232 cable to the adapter.